来源于从网页搭建入门Java Web
这里是过滤器(filter)和监听器(listener)专场
过滤器(filter)
作用:内容过滤处理,编码处理,权限处理
两种配置方式:web.xml @WebFilter
第一种
1
2
3
4
5
6
7
8
9
10
11
12
13
| <filter>
<filter-name>AFiler</filter-name>
<filter-class>pers.schwarzeni.learning.filter.AChainFilter</filter-class>
<init-param>
<param-name>version</param-name>
<param-value>v1.2.3</param-value>
</init-param>
</filter>
<filter-mapping>
<filter-name>AFiler</filter-name>
<url-pattern>/filter/target</url-pattern>
<dispatcher>FORWARD</dispatcher>
</filter-mapping>
|
注意两点:过滤器串的顺序和配置文件中<filter-mapping>声明的顺序相同,其次,设置的<dispatcher>告诉该过滤器作用于那种类型的url访问,有以下几种,基础好的人应该都不陌生
- FORWARD
- ERROR
- REQUEST
- INCLUDE
而 @WebFilter 方式声明过滤器无法控制顺序,它还有一些参数,这里就不再列举
1
2
3
4
5
6
| @WebFilter(filterName = "CChainFilter", urlPatterns = "/filter/target")
public class CChainFilter implements Filter {
@Override
public void destroy() {
}
......
|
使用过滤器需要实现 javax.servlet.Filter 接口,重写以下方法,下面是修改文件编码的例子
1
2
3
4
5
6
7
8
9
10
11
12
13
14
15
16
17
18
19
20
21
| @WebFilter(filterName = "ContentEncodingFilter", urlPatterns = "/*")
public class ContentEncodingFilter implements Filter {
private String encoding;
@Override
public void destroy() {
}
@Override
public void doFilter(ServletRequest req, ServletResponse resp, FilterChain chain) throws ServletException, IOException {
req.setCharacterEncoding(this.encoding);
chain.doFilter(req, resp);
resp.
}
@Override
public void init(FilterConfig config) throws ServletException {
this.encoding = config.getInitParameter("encoding");
}
}
|
如果把代码写在 chain.doFilter(req, resp); 下面就是对servlet已经处理好并准备返回的数据进行处理,其实和nodejs的express插件原理差不多
监听器(listener)
作用:统计在线人数,页面访问统计,应用启动时完成初始化工作,与Spring结合
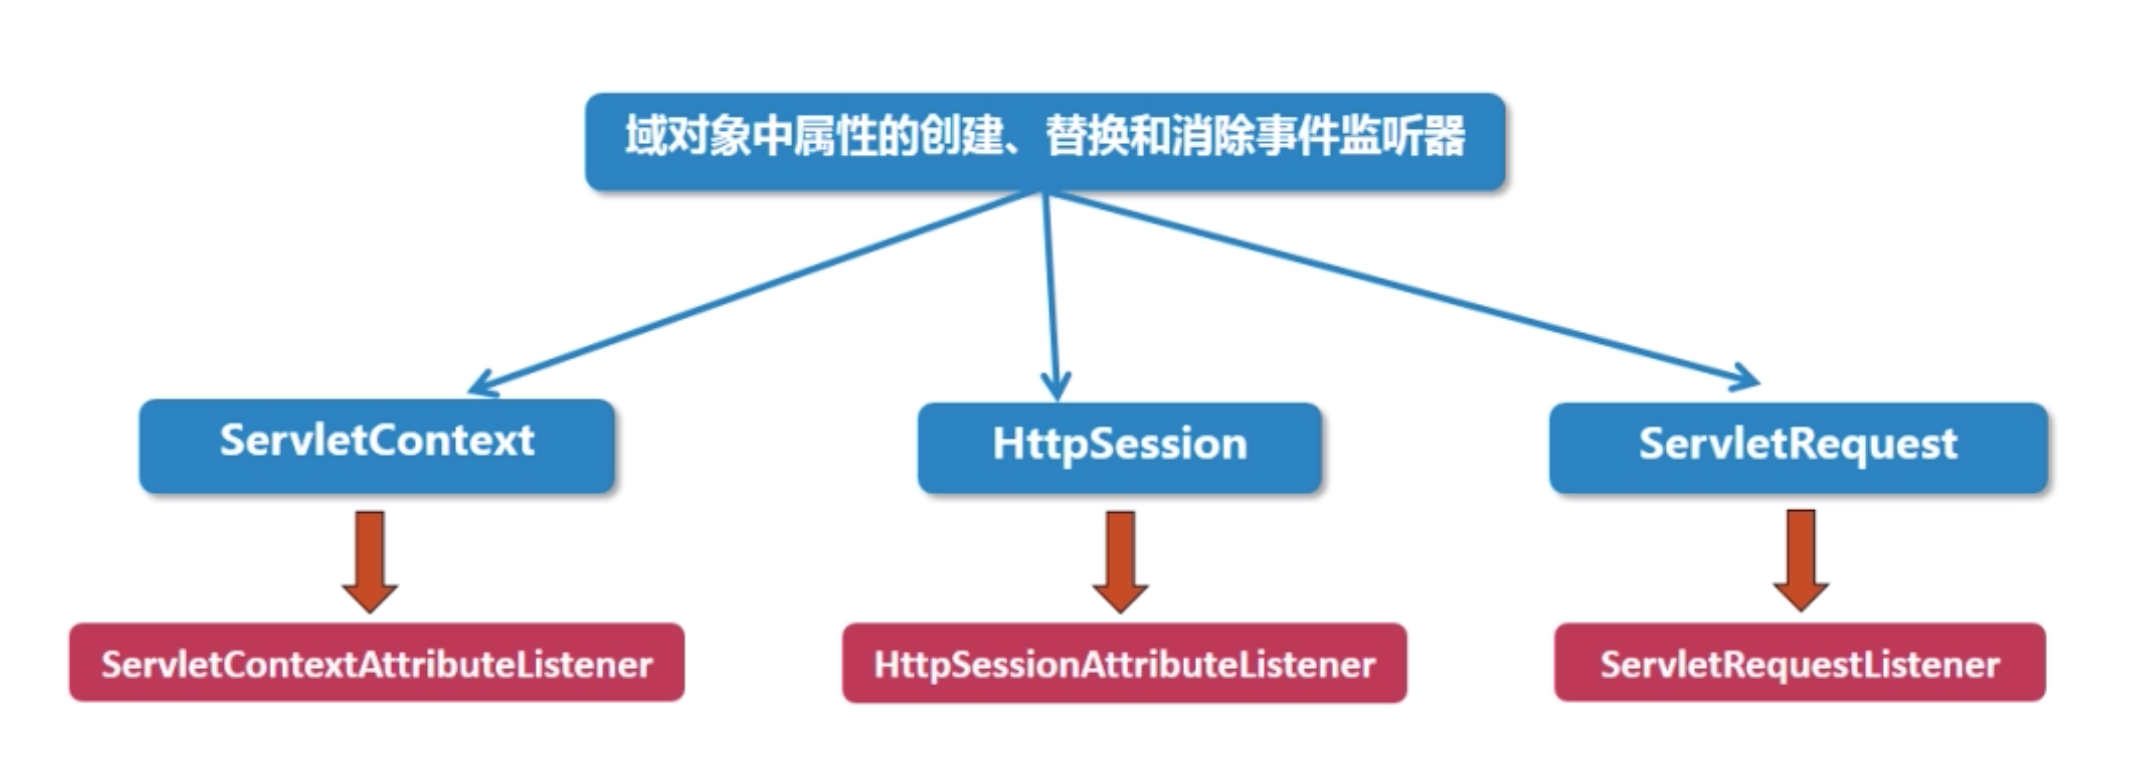
分类
- request类
- ServletRequestListener(创建销毁)
- ServletRequestAttributeListener (添加替换删除)
- session类
- HttpSessionListener(创建销毁)
- HttpSessionAttributeListener(添加替换删除)
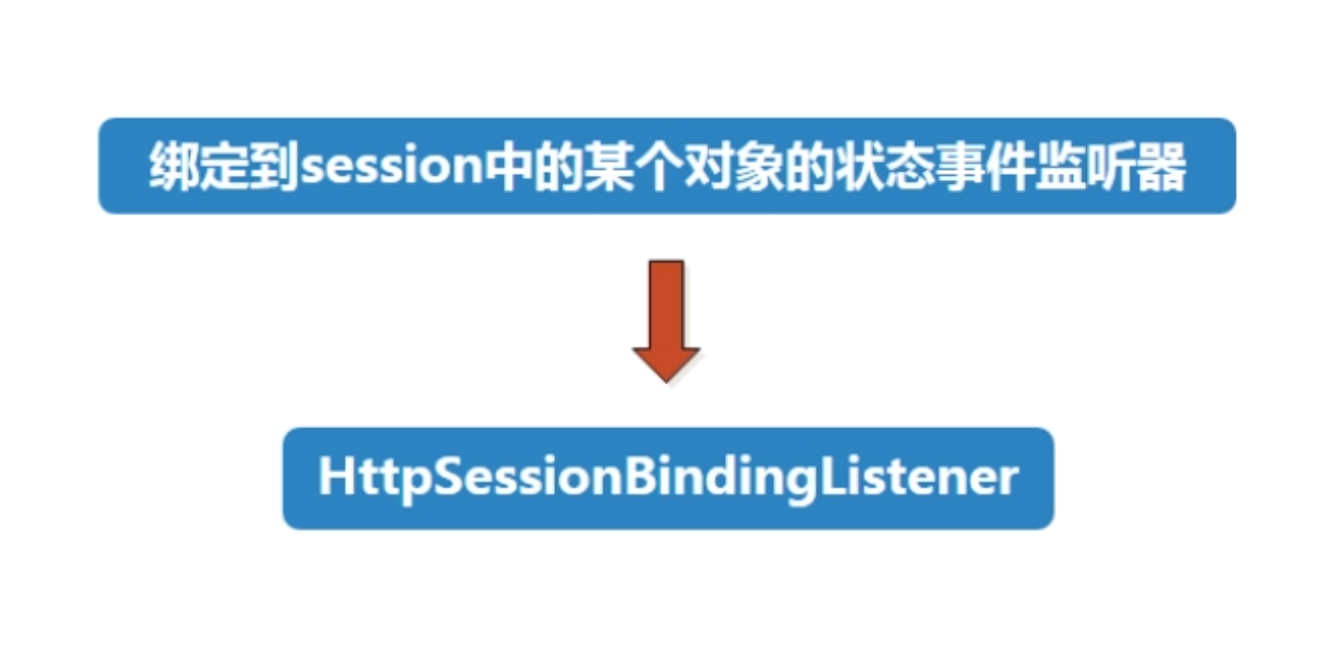
- HttpSessionBindingListener(绑定解绑)
- servlet类
- ServletContextListener(创建销毁)
- ServletContextAttributeListener(添加替换删除)
代表不同的作用域,分别要实现一些方法,这里就不再列举,可以通过两种方式声明,和过滤器类似,但是,HttpSessionBindingListener不用声明,使用方法如下
1
2
3
4
5
6
7
8
9
10
11
12
13
| public class MySerlvetSessionBindingListener implements HttpSessionBindingListener{
@Override
public void valueBound(HttpSessionBindingEvent httpSessionBindingEvent) {
System.out.print("绑定:");
System.out.println(httpSessionBindingEvent.getSession().getId() + " " + httpSessionBindingEvent.getName());
}
@Override
public void valueUnbound(HttpSessionBindingEvent httpSessionBindingEvent) {
System.out.println("解绑: " +httpSessionBindingEvent.getSession() + " " + httpSessionBindingEvent.getName());
}
}
|
只有在将其放入session移除session时才会触发这两个函数
1
2
| <%session.setAttribute("user", new MySerlvetSessionBindingListener());%>
<% session.removeAttribute("user"); %>
|
综合案例:登录控制
规则:同一个用户名同一时间只能有一个保持登录状态,新的登陆者会将就的登陆者挤下去
使用一个map存储 用户名 和 sessionId 之间的映射,一个map存储 sessionId 和 session 之间的映射
sessionId作为对用户的唯一标示,可以判断是否是同一个用户,避免误踢
在登录的时候提交表单名为username的用户名,将用户名存入session中,session.setAttribute("user", request.getParameter("username")) 使用监听器监听该事件,并判断是否重复登录
在用户要访问主页面的时候使用过滤器判断session中是否有用户的登录信息,没有的话使其返回登录页
以下为缓存两个map的类,使用单例模式
1
2
3
4
5
6
7
8
9
10
11
12
13
14
15
16
17
18
19
20
21
22
23
24
25
26
27
28
29
30
31
32
33
34
35
36
37
38
39
40
41
42
43
44
| public class UserCache {
private static UserCache userCache = new UserCache();
private Map<String, String>userSessionIdMap = new HashMap<>();
private Map<String, HttpSession> sessionIdSessionMap = new HashMap<>();
private UserCache() {
}
public static UserCache getInstance() {
return UserCache.userCache;
}
public String getSessionIdByUser(String user) {
return this.userSessionIdMap.get(user);
}
public void setSessionIdByUser(String user, String sessionId) {
this.userSessionIdMap.put(user, sessionId);
}
public HttpSession getSessionBySessionId(String sessionId) {
return this.sessionIdSessionMap.get(sessionId);
}
public void setSessionBySessionId(String sessionId, HttpSession session) {
this.sessionIdSessionMap.put(sessionId, session);
}
}
|
以下为监听器,监听对session的操作
1
2
3
4
5
6
7
8
9
10
11
12
13
14
15
16
17
18
19
20
21
22
23
24
25
26
27
28
29
30
31
32
33
34
35
36
37
38
39
40
| @WebListener()
public class LoginSessionAttributeListener implements HttpSessionAttributeListener {
public LoginSessionAttributeListener() {
}
@Override
public void attributeAdded(HttpSessionBindingEvent sbe) {
String attrName = sbe.getName();
if ("user".equals(attrName)) {
String user = (String)sbe.getValue();
HttpSession session = sbe.getSession();
String sessionId = session.getId();
String sessionId2 = UserCache.getInstance().getSessionIdByUser(user);
if (sessionId2 == null) {
} else {
HttpSession oldSession = UserCache.getInstance().getSessionBySessionId(sessionId2);
oldSession.invalidate();
}
UserCache.getInstance().setSessionBySessionId(sessionId, session);
UserCache.getInstance().setSessionIdByUser(user, sessionId);
}
}
@Override
public void attributeRemoved(HttpSessionBindingEvent sbe) {
}
@Override
public void attributeReplaced(HttpSessionBindingEvent sbe) {
}
}
|
过滤器判断session中是否用用户的登录信息
1
2
3
4
5
6
7
8
9
10
11
12
13
14
15
16
17
18
19
20
21
22
23
24
25
26
| @WebFilter(filterName = "UserFilter", urlPatterns = "/opl/app/*")
public class UserFilter implements Filter {
@Override
public void destroy() {
}
@Override
public void doFilter(ServletRequest req, ServletResponse resp, FilterChain chain) throws ServletException, IOException {
HttpServletRequest request = (HttpServletRequest)req;
String user = (String)request.getSession().getAttribute("user");
if (user == null) {
request.setAttribute("msg", "请先登录");
request.getRequestDispatcher("/opl/login.jsp").forward(request, resp);
return;
}
chain.doFilter(req, resp);
}
@Override
public void init(FilterConfig config) throws ServletException {
}
}
|
最后是登录的jsp
1
2
3
4
5
6
7
8
9
10
11
12
13
14
15
16
17
18
19
20
21
| <%@ page contentType="text/html;charset=UTF-8" language="java" %>
<%
if ("POST".equalsIgnoreCase(request.getMethod())) {
String username = request.getParameter("username");
request.getSession().setAttribute("user", username);
response.sendRedirect("/opl/app/index.jsp");
}
%>
<html>
<head>
<title>Title</title>
</head>
<body>
<p style="text-align: center;color: #ff0000;">${msg}</p>
<form action="/opl/login.jsp" method="post">
<input type="text" name="username"/>
<button type="submit">提交</button>
</form>
</body>
</html>
|