网上居然没找到一则完整的入门教程…
环境参数
环境搭建
首先,使用angular脚手架初始化项目(需要先全局安装 @angular/cli)
1
2
| npm install -g @angular/cli
ng new ckeditor-angular
|
其次,安装 Ckeditor5 相关依赖,进入项目根目录
1
2
3
| npm install --save @ckeditor/ckeditor5-angular
npm install --save @ckeditor/ckeditor5-build-classic
npm install --save @ckeditor/ckeditor5-ui
|
前两个是必须的,第三个是为了编写保存功能插件而安装的
安装完毕后使用编辑器打开项目,我使用的是 Intellij IDEA
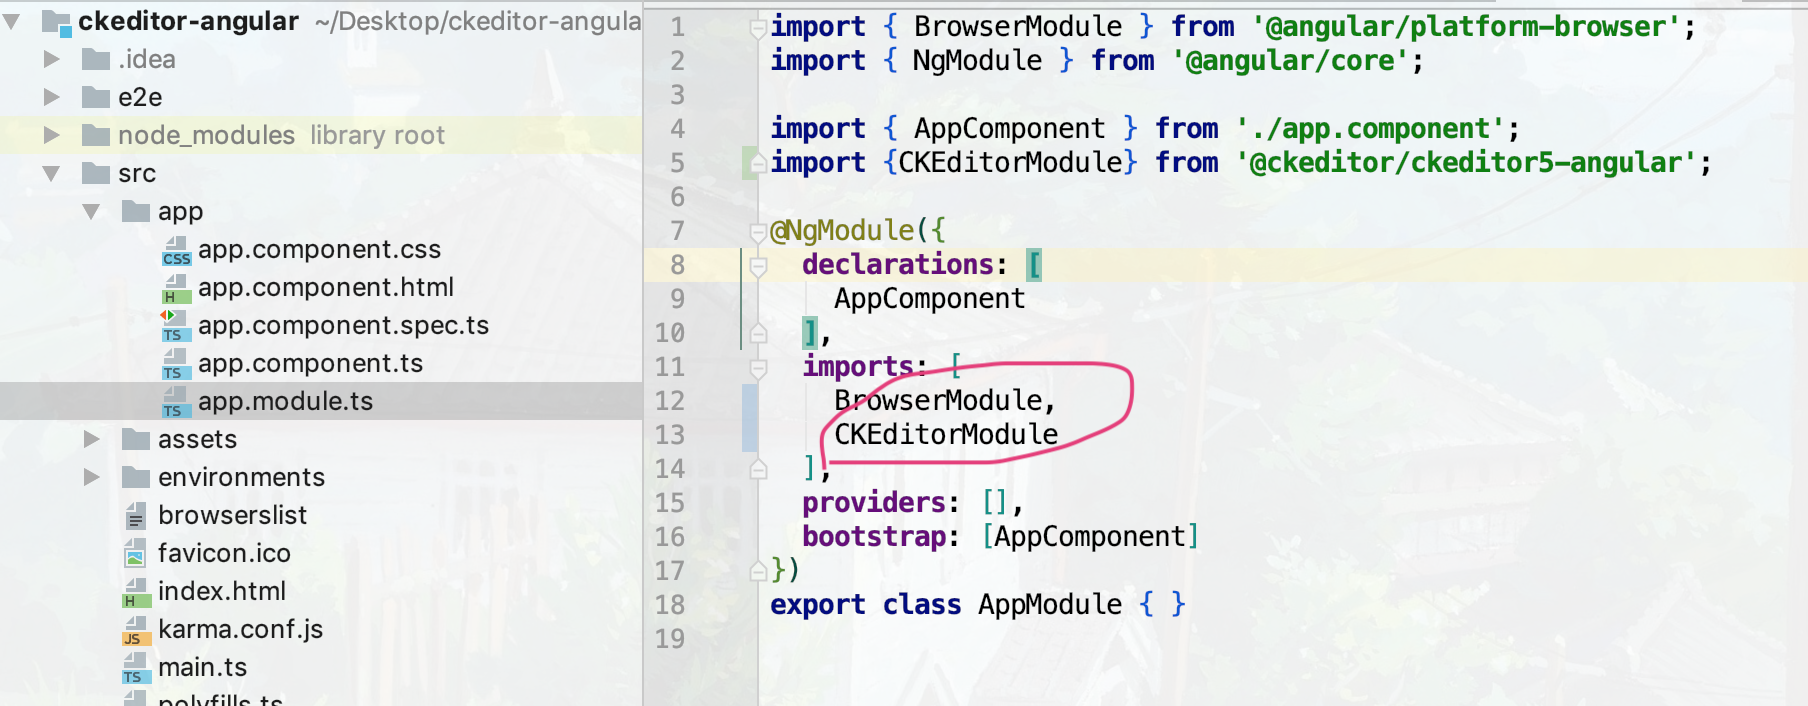
在 src/app/app.module.ts 中添加 CKEditorModule,如下
为了演示方便,将 src/app/app.component.html 和 src/app/app.component.css 删除,html内容在 src/app/app.component.ts 中编写,第一版代码具体代码如下
1
2
3
4
5
6
7
8
9
10
11
12
13
14
|
import {Component} from '@angular/core';
import * as ClassicEditor from '@ckeditor/ckeditor5-build-classic';
@Component({
selector: 'app-root',
template: `
<ckeditor [editor]="Editor" data="<p>Hello, world!</p>">
</ckeditor>
`
})
export class AppComponent {
public Editor = ClassicEditor;
}
|
输入 ng serve 查看效果
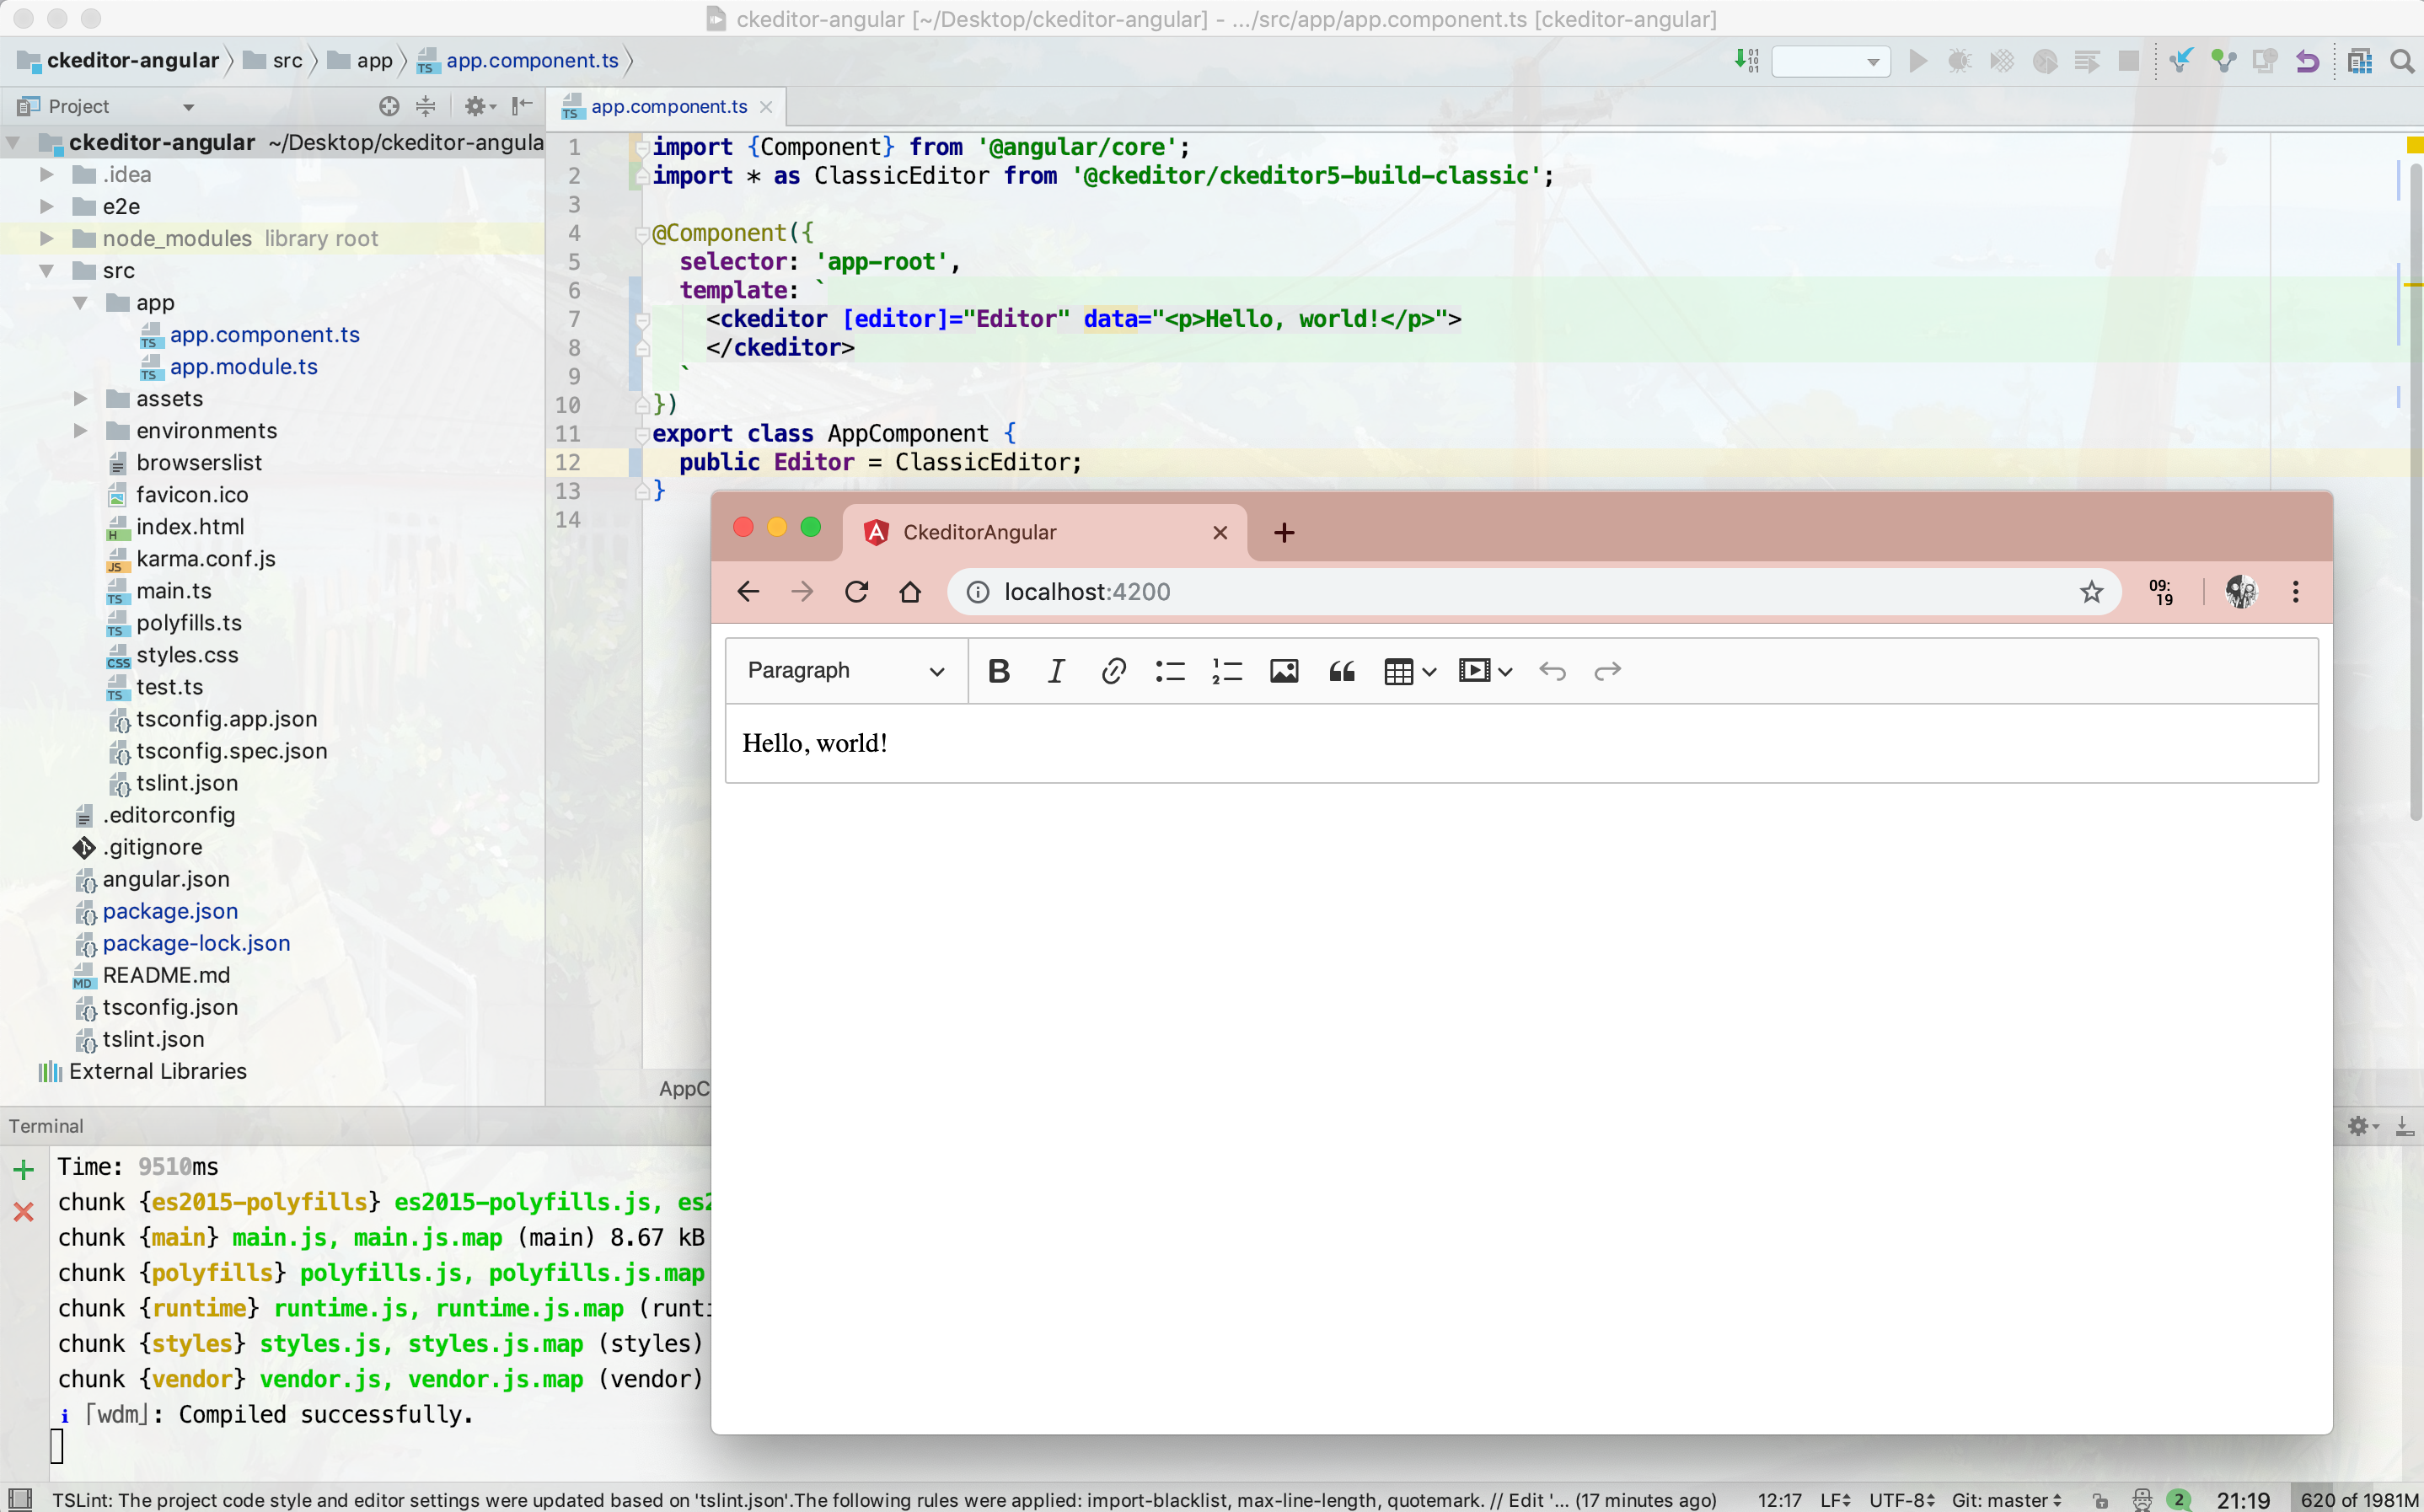
至此环境搭建完毕
对Ckeditor进行配置
完成两项配置:1,中文化;2,自己配置按钮的数量类型
中文化
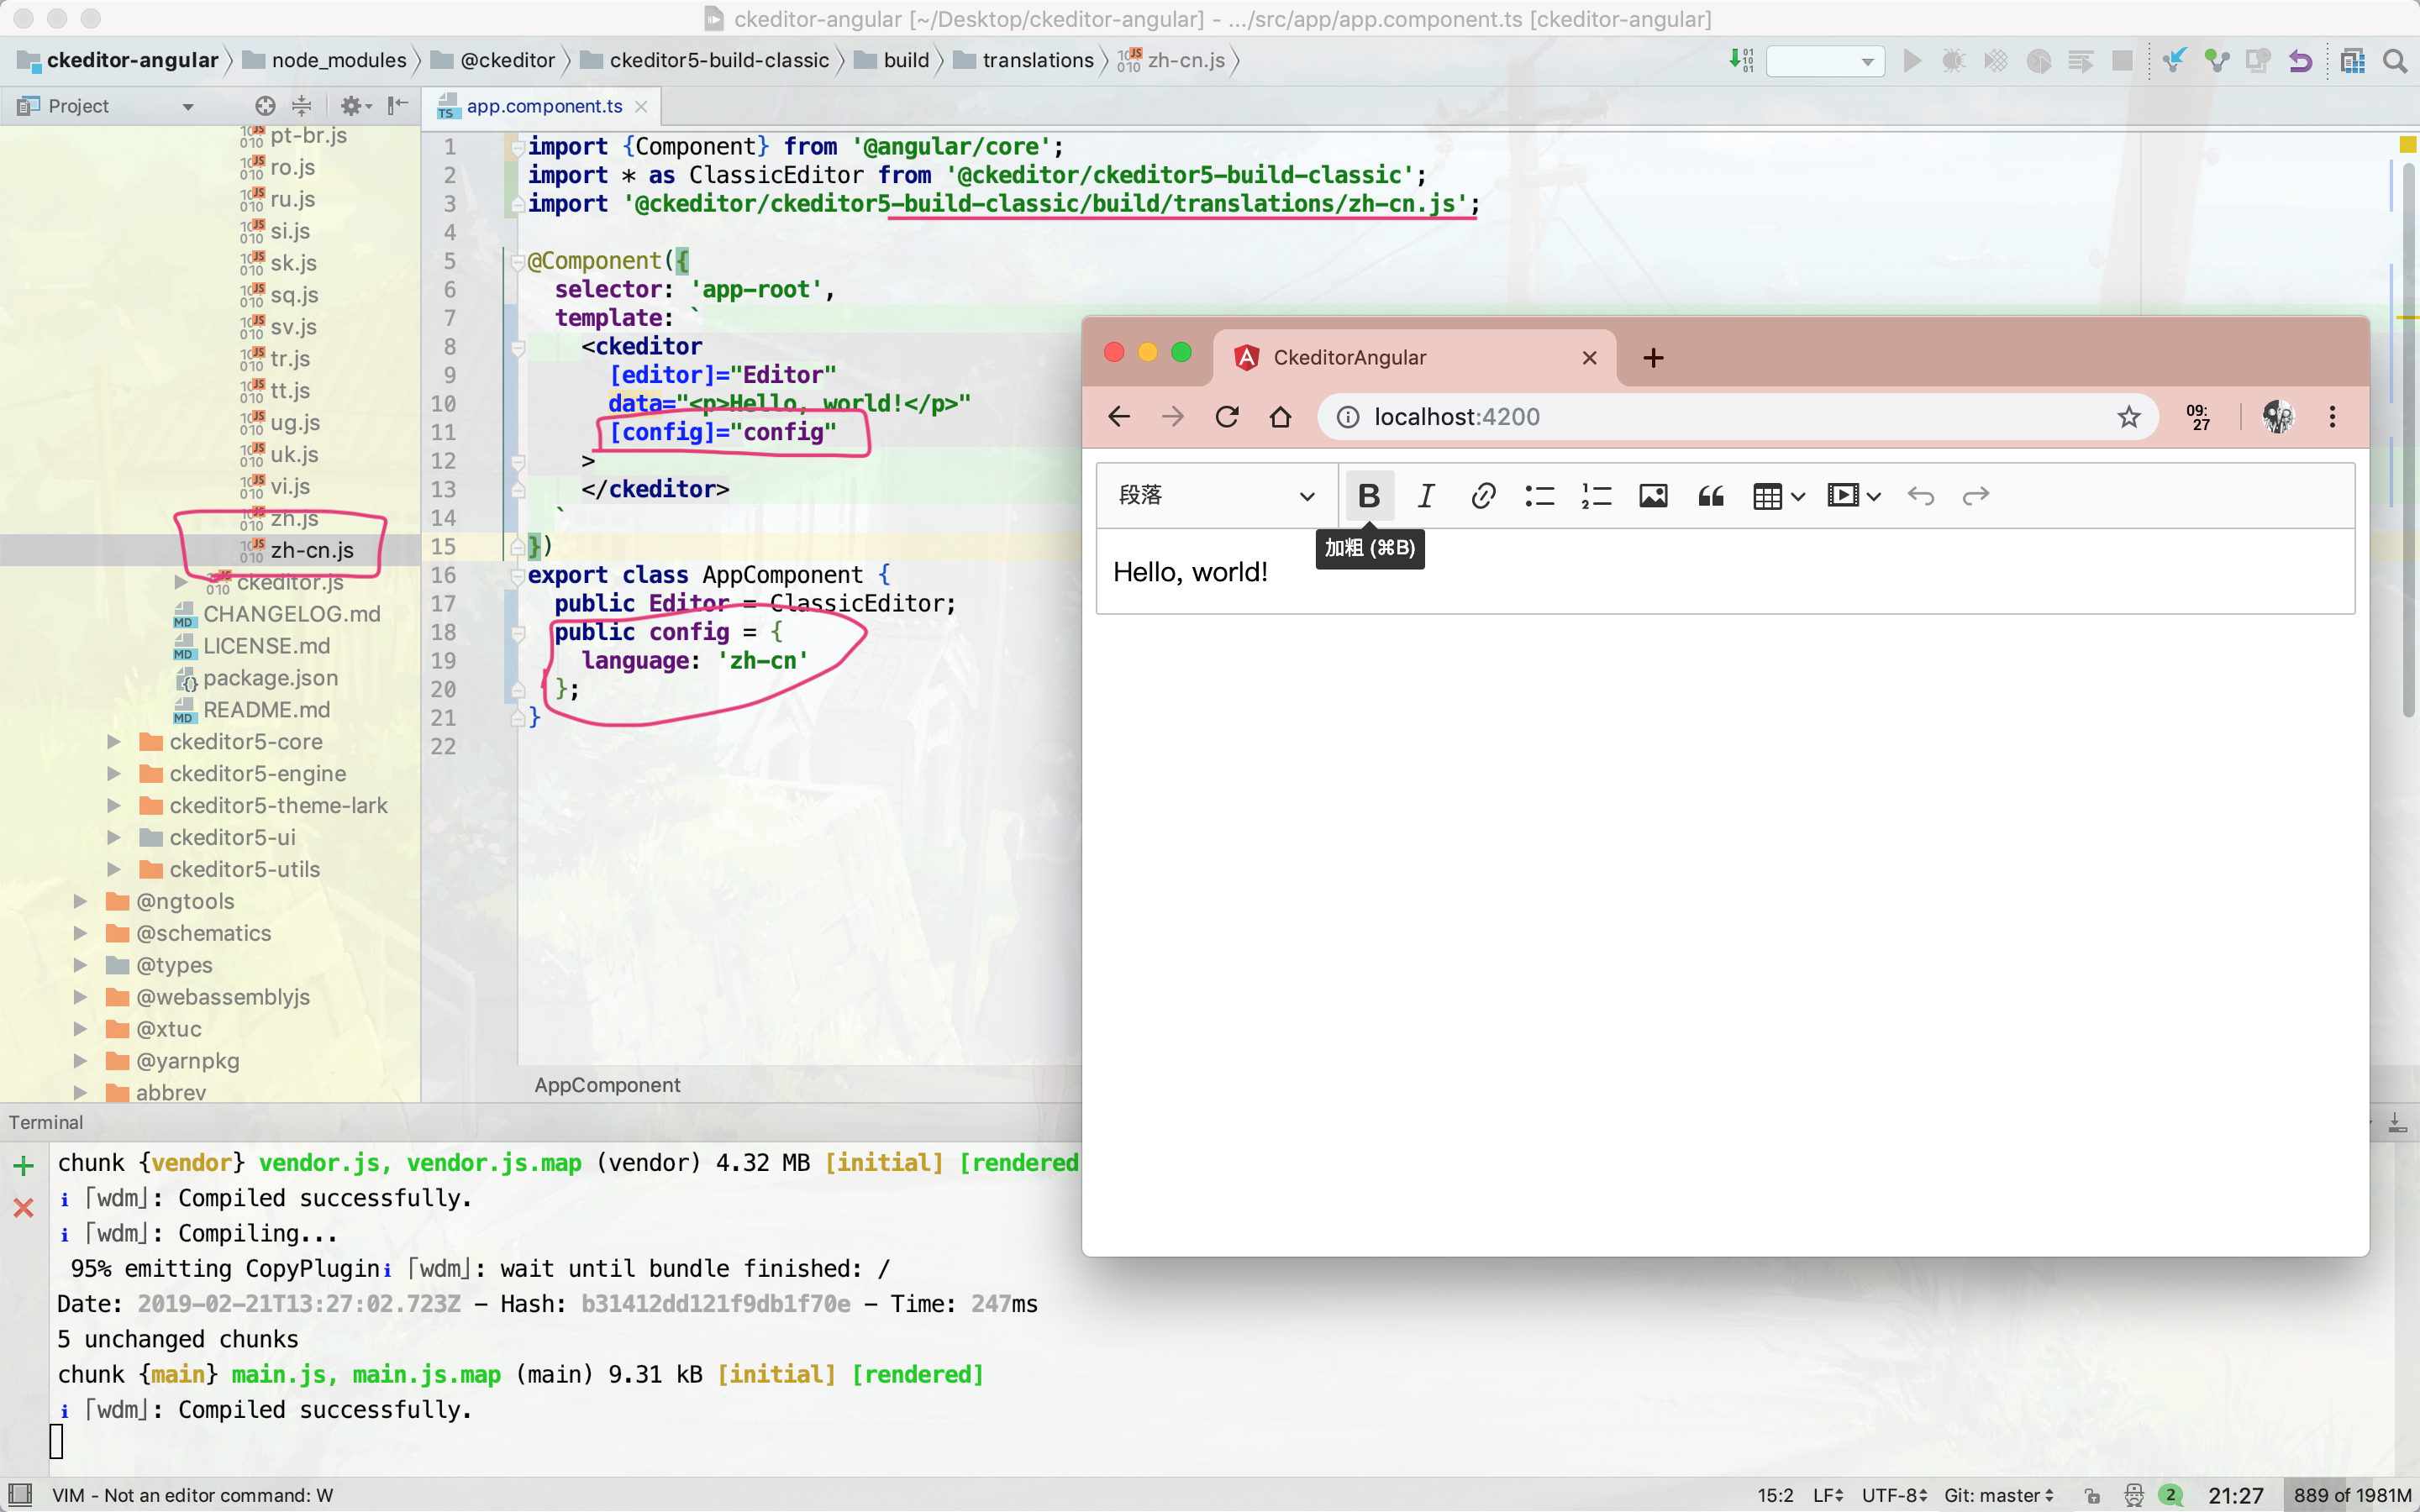
顺着包路径 /Users/nizhenyang/Desktop/ckeditor-angular/node_modules/@ckeditor/ckeditor5-build-classic/build/translations一路找下去就会发现有一大堆地区语言的js文件,其中就有 zh-cn.js,将其加入到ts文件中,同时添加配置对象config,传入到 组件 ckeditor 中,app.component.ts修改如下
1
2
3
4
5
6
7
8
9
10
11
12
13
14
15
16
17
18
19
20
21
22
| import {Component} from '@angular/core';
import * as ClassicEditor from '@ckeditor/ckeditor5-build-classic';
import '@ckeditor/ckeditor5-build-classic/build/translations/zh-cn.js';
@Component({
selector: 'app-root',
template: `
<ckeditor
[editor]="Editor"
data="<p>Hello, world!</p>"
[config]="config"
>
</ckeditor>
`
})
export class AppComponent {
public Editor = ClassicEditor;
public config = {
language: 'zh-cn'
};
}
|
效果如下
配置按钮
这个也是在那个 config 对象中配置,就添加上传图片的按钮和加粗的按钮吧,中间再填个一个分隔符,配置如下
1
2
3
4
5
6
7
8
9
|
export class AppComponent {
public Editor = ClassicEditor;
public config = {
language: 'zh-cn',
toolbar: ['imageUpload', '|', 'bold']
};
}
|
效果如下

更多按钮请参考官网文档
添加上传图片的功能
搭建测试文件服务器
首先,先搭建一个简单的提供文件上传下载功能的nodejs服务器
这里就在根目录下新建文件夹 file-server,进入其中,安装express等依赖
1
2
3
4
5
|
npm init
npm install --save express
npm install --save express-fileupload
npm install --save body-parser
|
新建app.js文件,向其中填写基础代码;新建uploads文件夹,作为上传文件的文件夹
1
2
3
4
5
6
7
8
9
10
11
12
13
14
15
16
17
18
19
20
21
22
23
24
25
26
27
28
29
30
31
32
33
34
35
36
37
38
39
40
41
42
43
44
45
46
47
48
49
50
51
52
53
54
| const express = require('express');
const fileUpload = require('express-fileupload');
const app = express();
const path = require('path');
const PORT = 8000;
const bodyParser = require('body-parser')
app.use(bodyParser.json());
app.post('/upload/content', function(req, res) {
console.log(req.body)
res.send(req.body)
})
app.use(fileUpload());
app.use('/uploads',express.static('uploads'))
app.post('/upload', function(req, res) {
let sampleFile;
let uploadPath;
if (Object.keys(req.files).length == 0) {
res.status(400).send('No files were uploaded.');
return;
}
console.log('req.files >>>', req.files);
sampleFile = req.files.file;
const filename = (new Date().getTime()) + sampleFile.name;
uploadPath = path.join(__dirname, 'uploads', filename);
sampleFile.mv(uploadPath, function(err) {
if (err) {
return res.status(500).send(err);
}
res.send({default: path.join('uploads', filename)})
});
});
app.listen(PORT, function() {
console.log('Express server listening on port ', PORT);
});
|
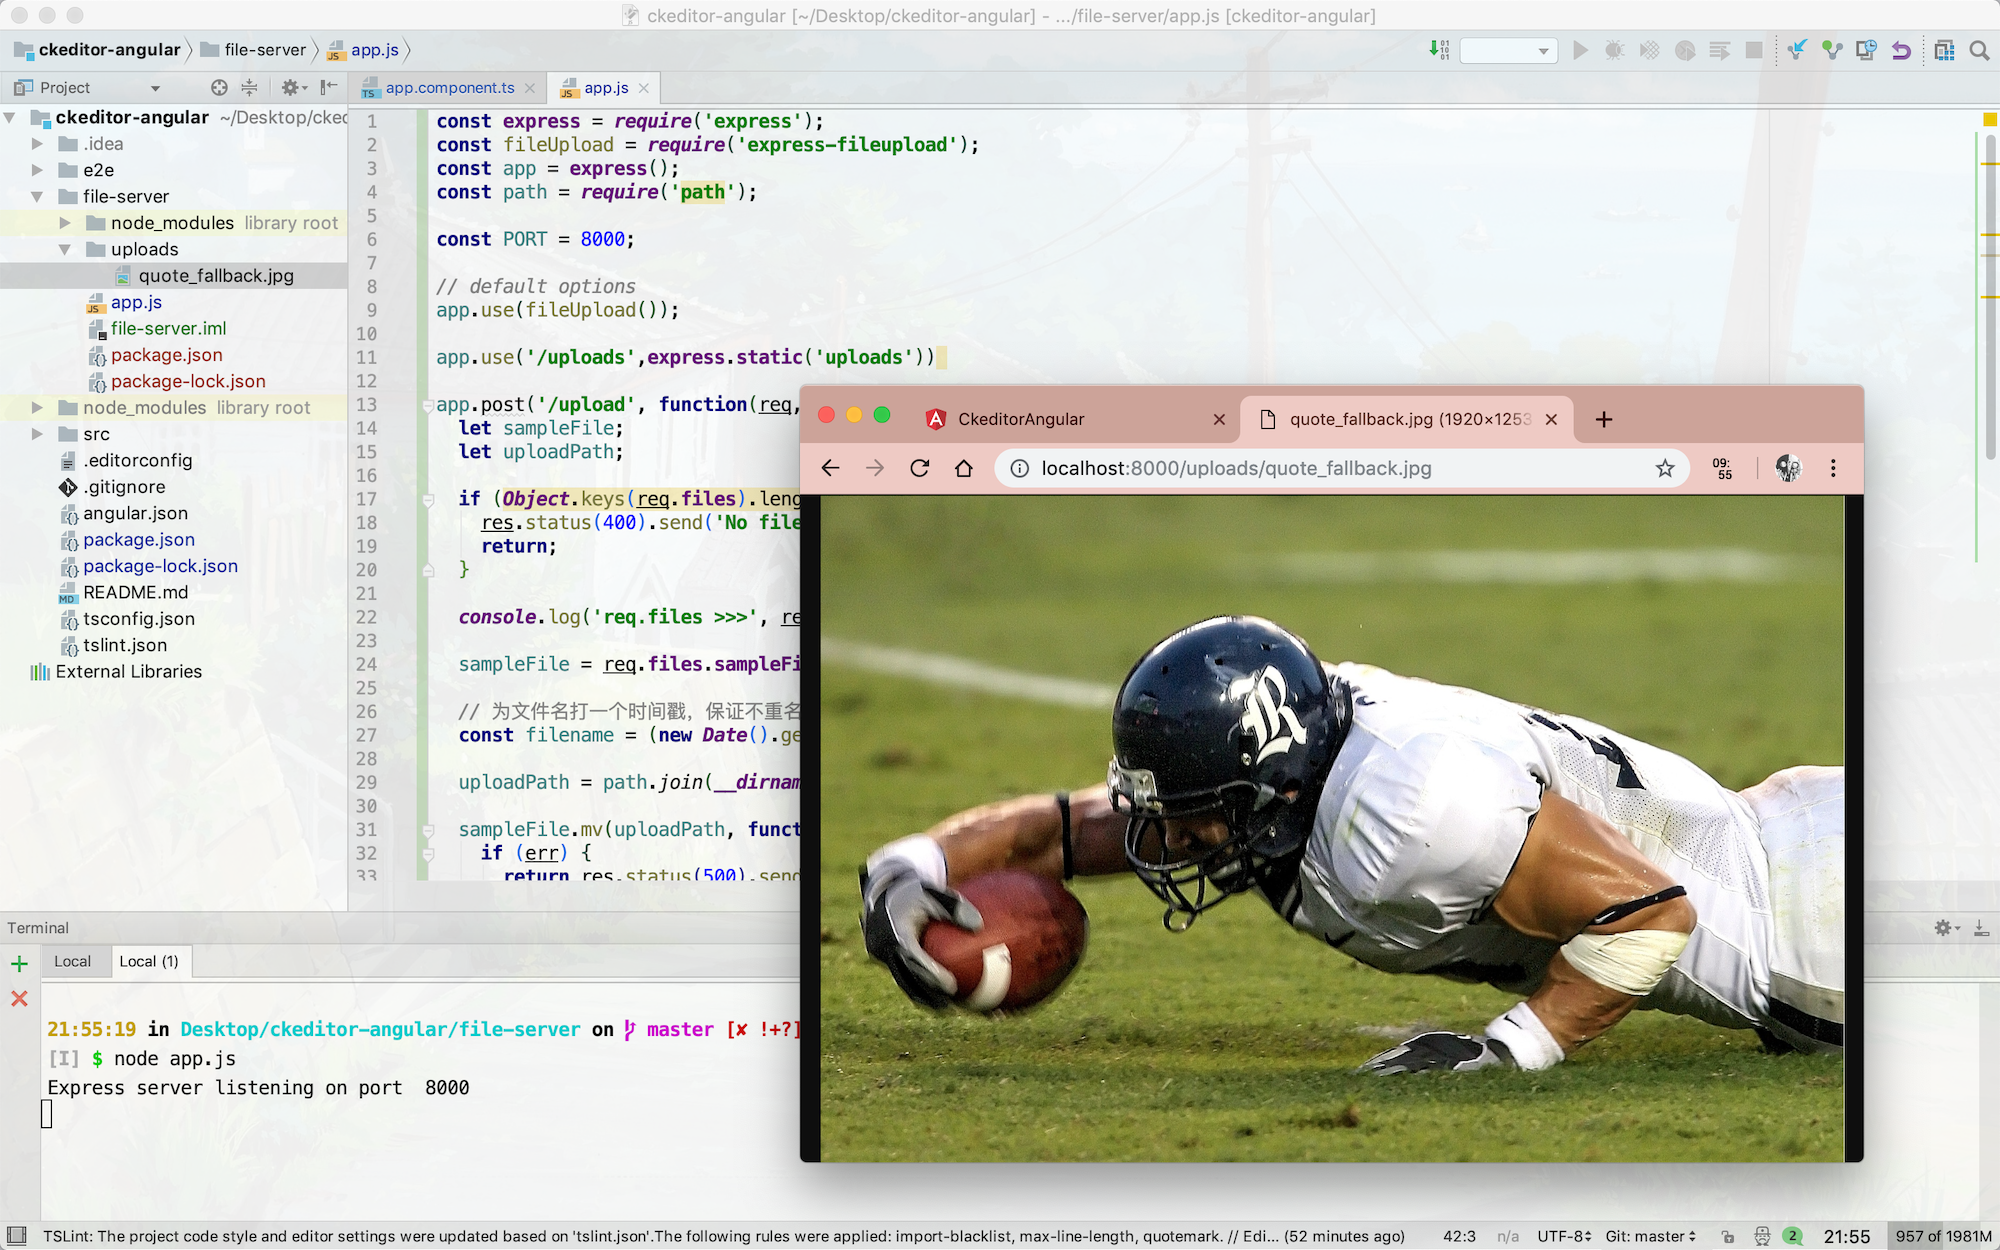
启动app.js,监听8000端口;在uplaods文件夹中放入一个图片文件,通过浏览器可以访问,代表成功
前后端打通
不做任何配置的话前端是无法跨域访问后端文件服务器的,这里需要配置angular的server
在ckeditor-angular根目录下新建文件 proxy.config.json,进行如下配置
1
2
3
4
5
6
7
8
9
10
11
12
13
14
| {
"/uploads/*": {
"target": "http://localhost:8000",
"secure": false,
"changeOrigin": true,
"logLevel": "debug"
},
"/upload/*": {
"target": "http://localhost:8000",
"secure": false,
"changeOrigin": true,
"logLevel": "debug"
}
}
|
第一个是GET图片的所有请求,第二个是POST图片的所有请求
重启 ng serve,但是需要让其读取这个配置文件
1
| ng serve --proxy-config proxy.config.json
|
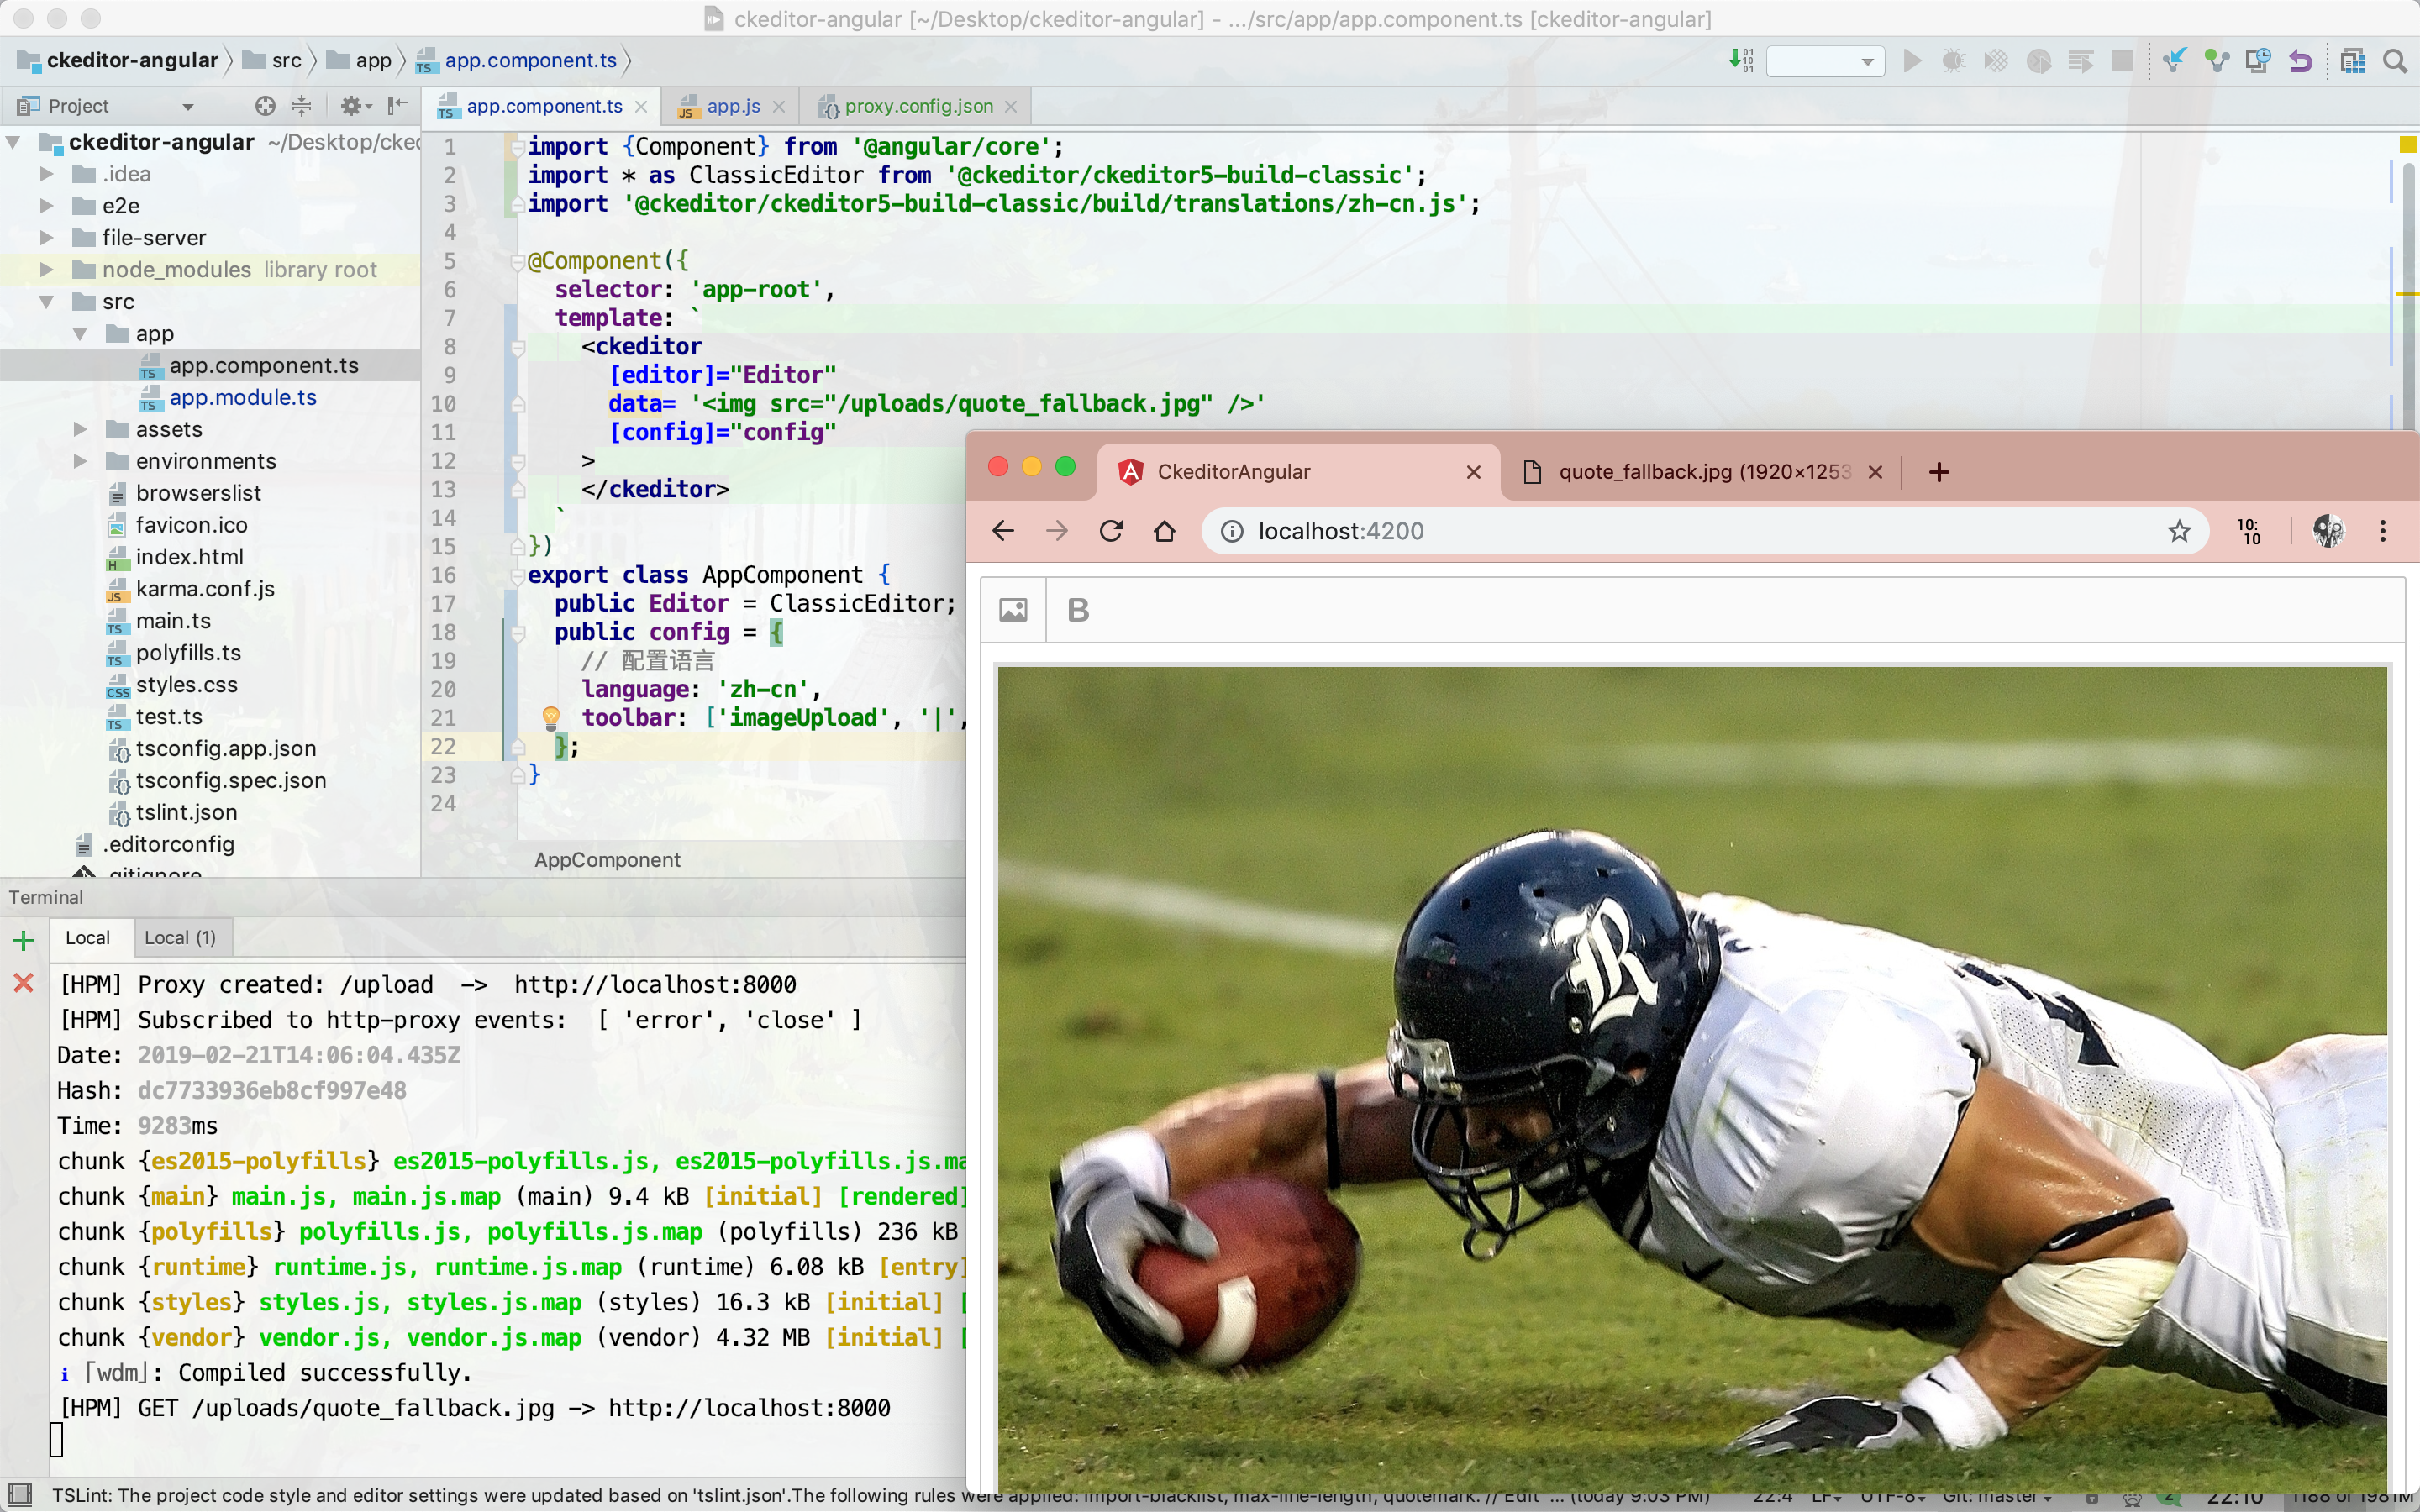
修改 app.component.ts 内容,让其访问图片
1
2
3
4
5
6
7
8
9
10
11
12
13
|
@Component({
selector: 'app-root',
template: `
<ckeditor
[editor]="Editor"
data= '<img src="/uploads/quote_fallback.jpg" />'
[config]="config"
>
</ckeditor>
`
})
|
效果如下,访问成功
编写上传图片插件
在 app.component.ts 同级目录下创建文件 fileupload.ckeditor.ts ,在其中编写上传插件,大体框架如下
1
2
3
4
5
6
7
8
9
10
11
12
13
14
15
16
17
18
19
20
21
22
23
24
|
export class FileUploadAdapter {
constructor(loader) {
}
upload() {
}
abort() {
}
}
export function CustomUploadAdapterPlugin(editor) {
editor.plugins.get('FileRepository').createUploadAdapter = (loader) => {
return new FileUploadAdapter(loader);
};
}
|
最后,将第二个函数添加到 app.component.ts 中的config对象中(这里重构了一下,将config对象的初始化放到constructor中),部分代码如下
1
2
3
4
5
6
7
8
9
10
11
|
constructor(private http: HttpClient) {
this.config = {
language: 'zh-cn',
toolbar: ['imageUpload', '|', 'bold'],
extraPlugins: [CustomUploadAdapterPlugin]
};
}
|
首先,这个第二个函数中的 editor 和 loader 是ckeditor注入的,和我们使用者无关;其次,由于它们没有什么关系,而angular发送http模块初始化也是有angular管理和注入的,和我们无关,所有说要在fileupload.ckeditor.ts中使用angular的模块就有点麻烦。使用函数参数传入的方法貌似也不好使,貌似this作用域改变了。
我给出的解决方案是将其作为config对象的一个参数传入,然后在 fileupload.ckeditor.ts 文件中通过 editor.config.get() 来获得,app.component.ts文件如下,记得在 app.module.ts 中import添加 HttpClientModule
1
2
3
4
5
6
7
8
9
10
11
12
13
14
15
16
17
18
19
20
21
22
23
24
25
26
27
28
29
30
31
32
| import {Component} from '@angular/core';
import * as ClassicEditor from '@ckeditor/ckeditor5-build-classic';
import '@ckeditor/ckeditor5-build-classic/build/translations/zh-cn.js';
import {HttpClient} from '@angular/common/http';
import {CustomUploadAdapterPlugin} from './fileupload.ckeditor';
@Component({
selector: 'app-root',
template: `
<ckeditor
[editor]="Editor"
data=''
[config]="config"
>
</ckeditor>
`
})
export class AppComponent {
public Editor = ClassicEditor;
public config
constructor(private http: HttpClient) {
this.config = {
language: 'zh-cn',
toolbar: ['imageUpload', '|', 'bold'],
http,
extraPlugins: [CustomUploadAdapterPlugin]
};
}
}
|
fileupload.ckeditor.ts 完整代码如下
1
2
3
4
5
6
7
8
9
10
11
12
13
14
15
16
17
18
19
20
21
22
23
24
25
26
27
28
29
30
31
32
33
34
35
36
37
38
| export class FileUploadAdapter {
loader;
http;
editor;
constructor(loader, editor) {
this.loader = loader;
this.editor = editor;
this.http = this.editor.config.get('http');
}
upload() {
const data = new FormData();
data.append('file', this.loader.file);
return new Promise((resolve, reject) => {
this.http.post(
'/upload',
data)
.subscribe(
(resp) => {
console.log(resp)
resolve({
default: resp.default
});
},
(err) => reject(err));
});
}
abort() {
}
}
export function CustomUploadAdapterPlugin(editor) {
editor.plugins.get('FileRepository').createUploadAdapter = (loader) => {
return new FileUploadAdapter(loader, editor);
};
}
|
对于FileUploadAdapter,有几个注意点
1.不要自作多情设置header Content-Type:multipart/form-data
2.注意返回给ckeditor的resolve传入的对象中 default 属性对应图片的路径
进行测试,上传成功,同时查看 file-server/uploads中有刚才上传的文件
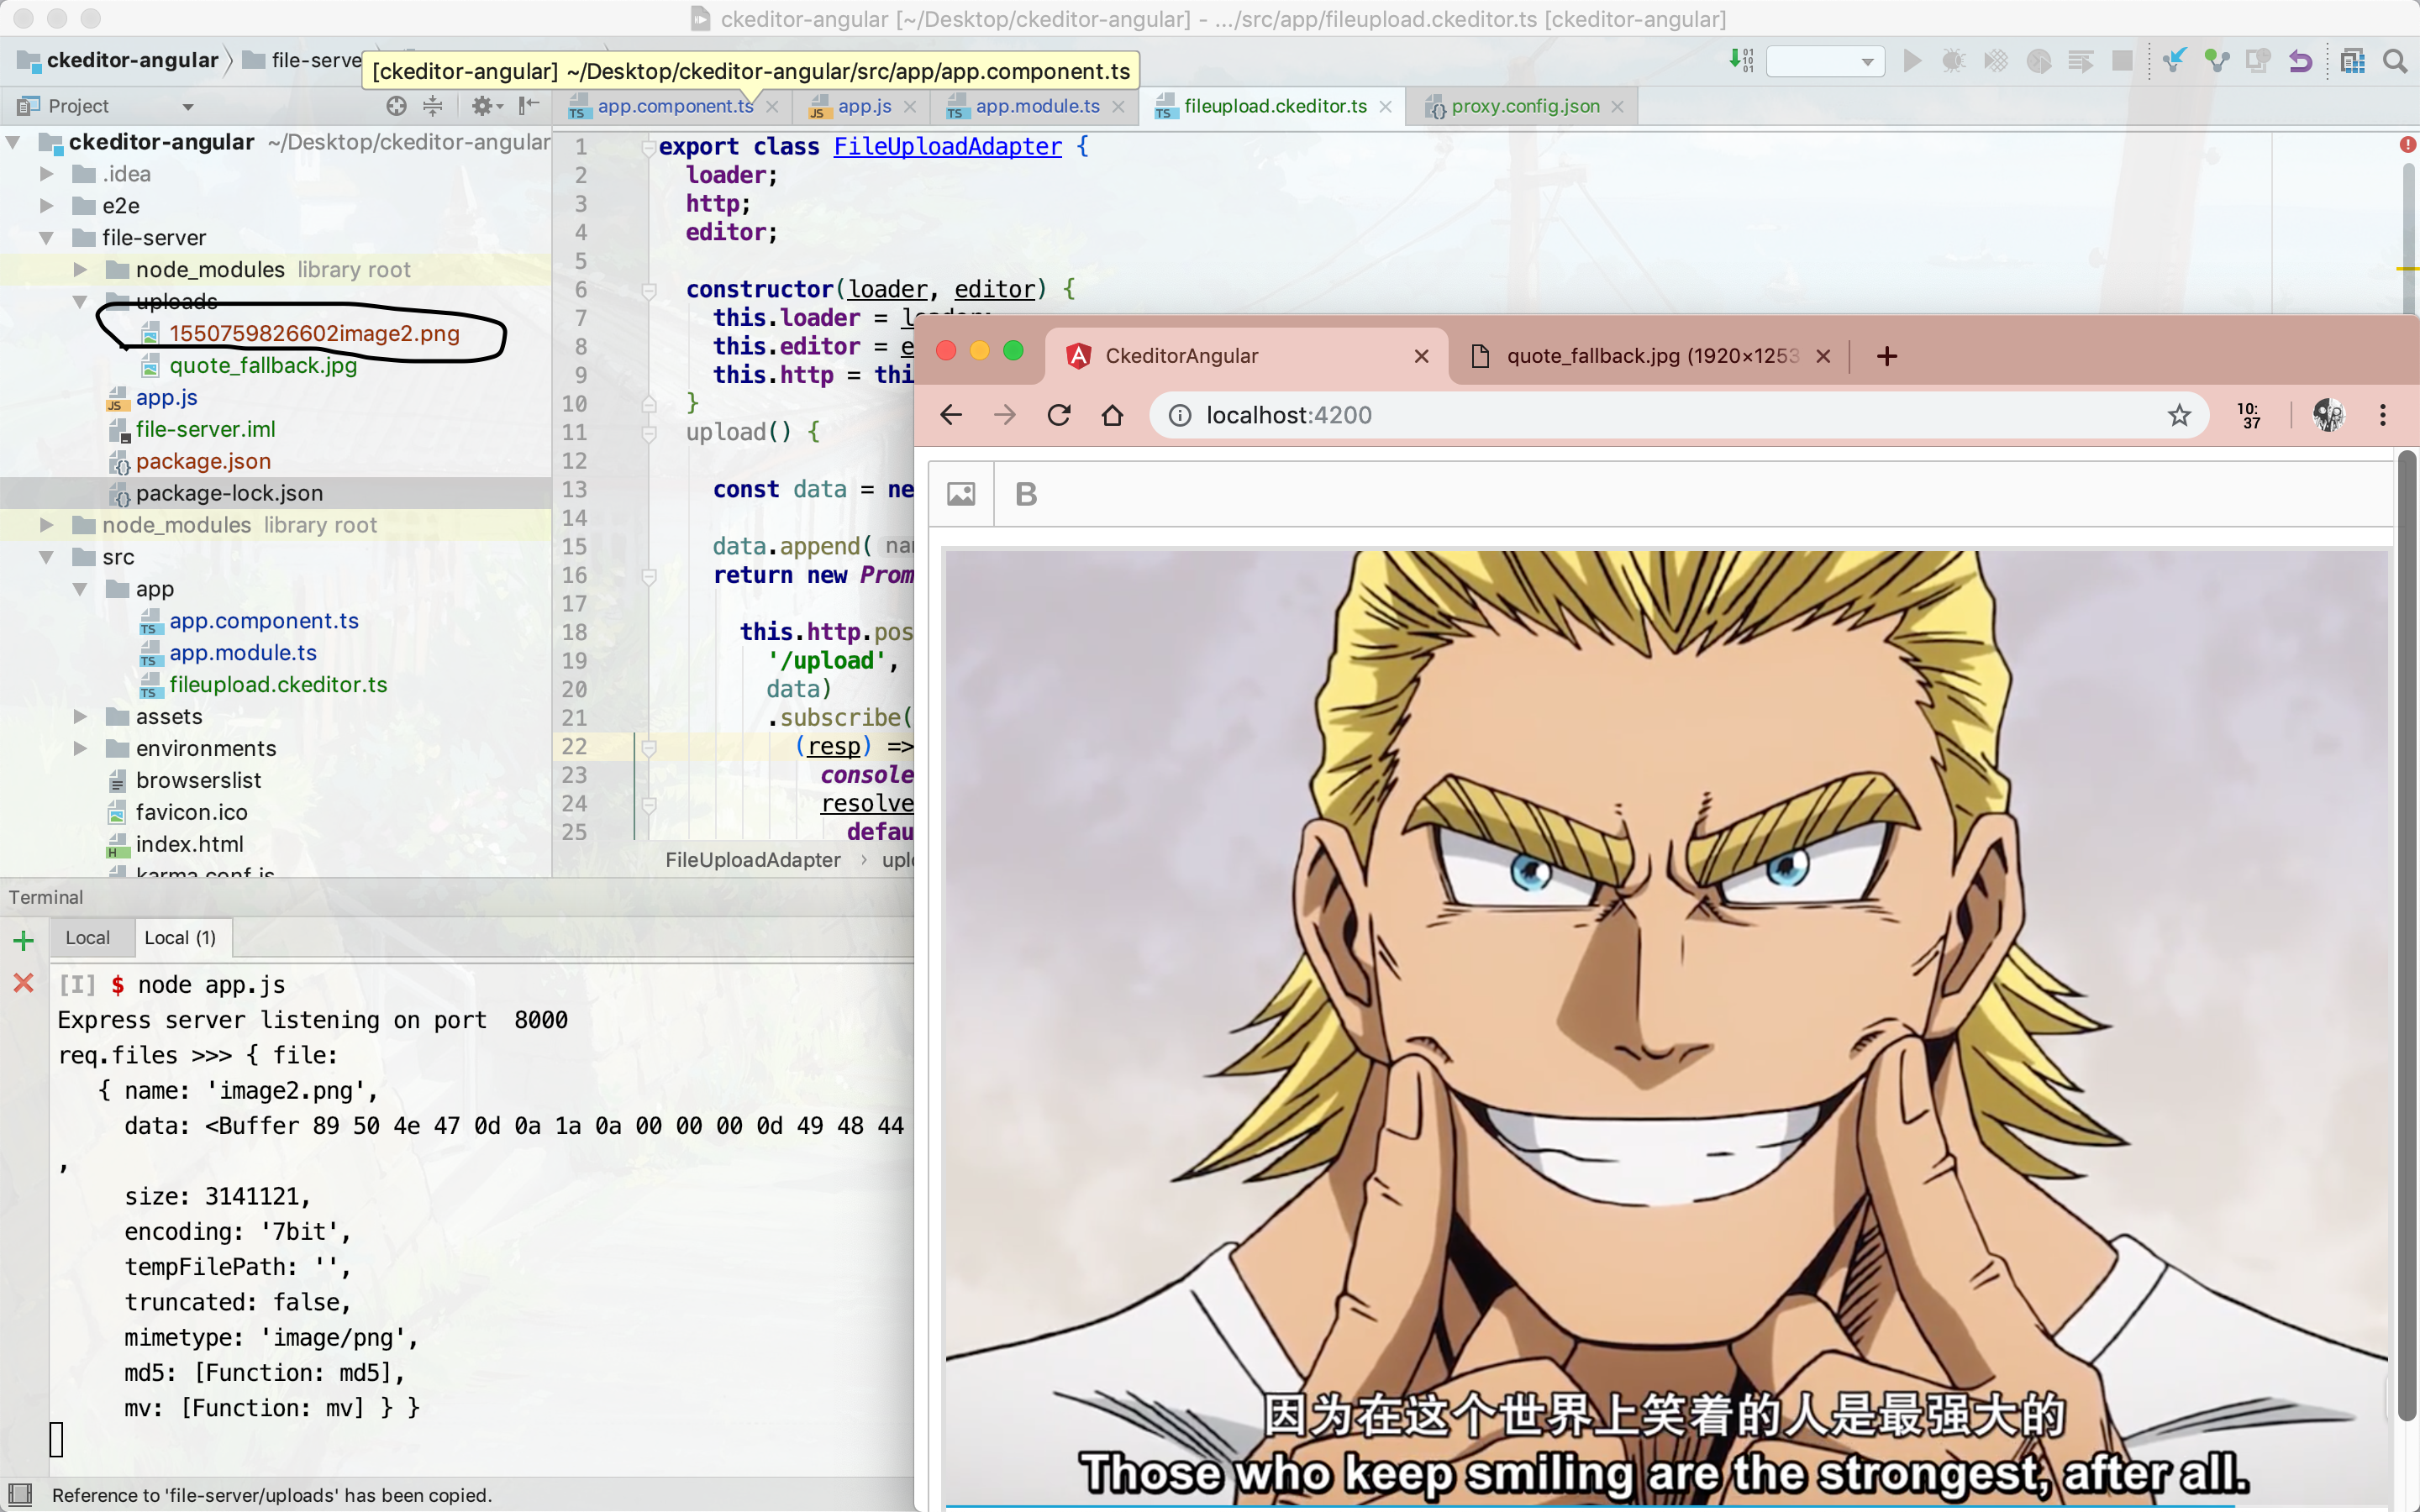
至此文件上传服务编写完毕
编写保存功能
这个需求是在ckeditor的按钮列表中添加保存选项,点击后将数据传输至服务器,这里的测试服务器也使用file-server
编写功能按钮
新建文件 savefile.ckeditor.ts,这其中编写如下代码
1
2
3
4
5
6
7
8
9
10
11
12
13
14
15
16
17
18
19
20
| import ButtonView from '@ckeditor/ckeditor5-ui/src/button/buttonview';
export function SaveFilePlugin(editor) {
editor.ui.componentFactory.add( 'save', locale => {
const view = new ButtonView( locale );
view.set( {
label: '保存',
withText: true,
} );
view.on( 'execute', () => {
console.log('执行保存指令');
} );
return view;
} );
}
|
修改 app.component.ts,部分如下
1
2
3
4
5
6
7
8
9
10
11
12
|
constructor(private http: HttpClient) {
this.config = {
language: 'zh-cn',
toolbar: ['imageUpload', '|', 'bold', '|', 'save'],
http,
extraPlugins: [CustomUploadAdapterPlugin, SaveFilePlugin]
};
}
|
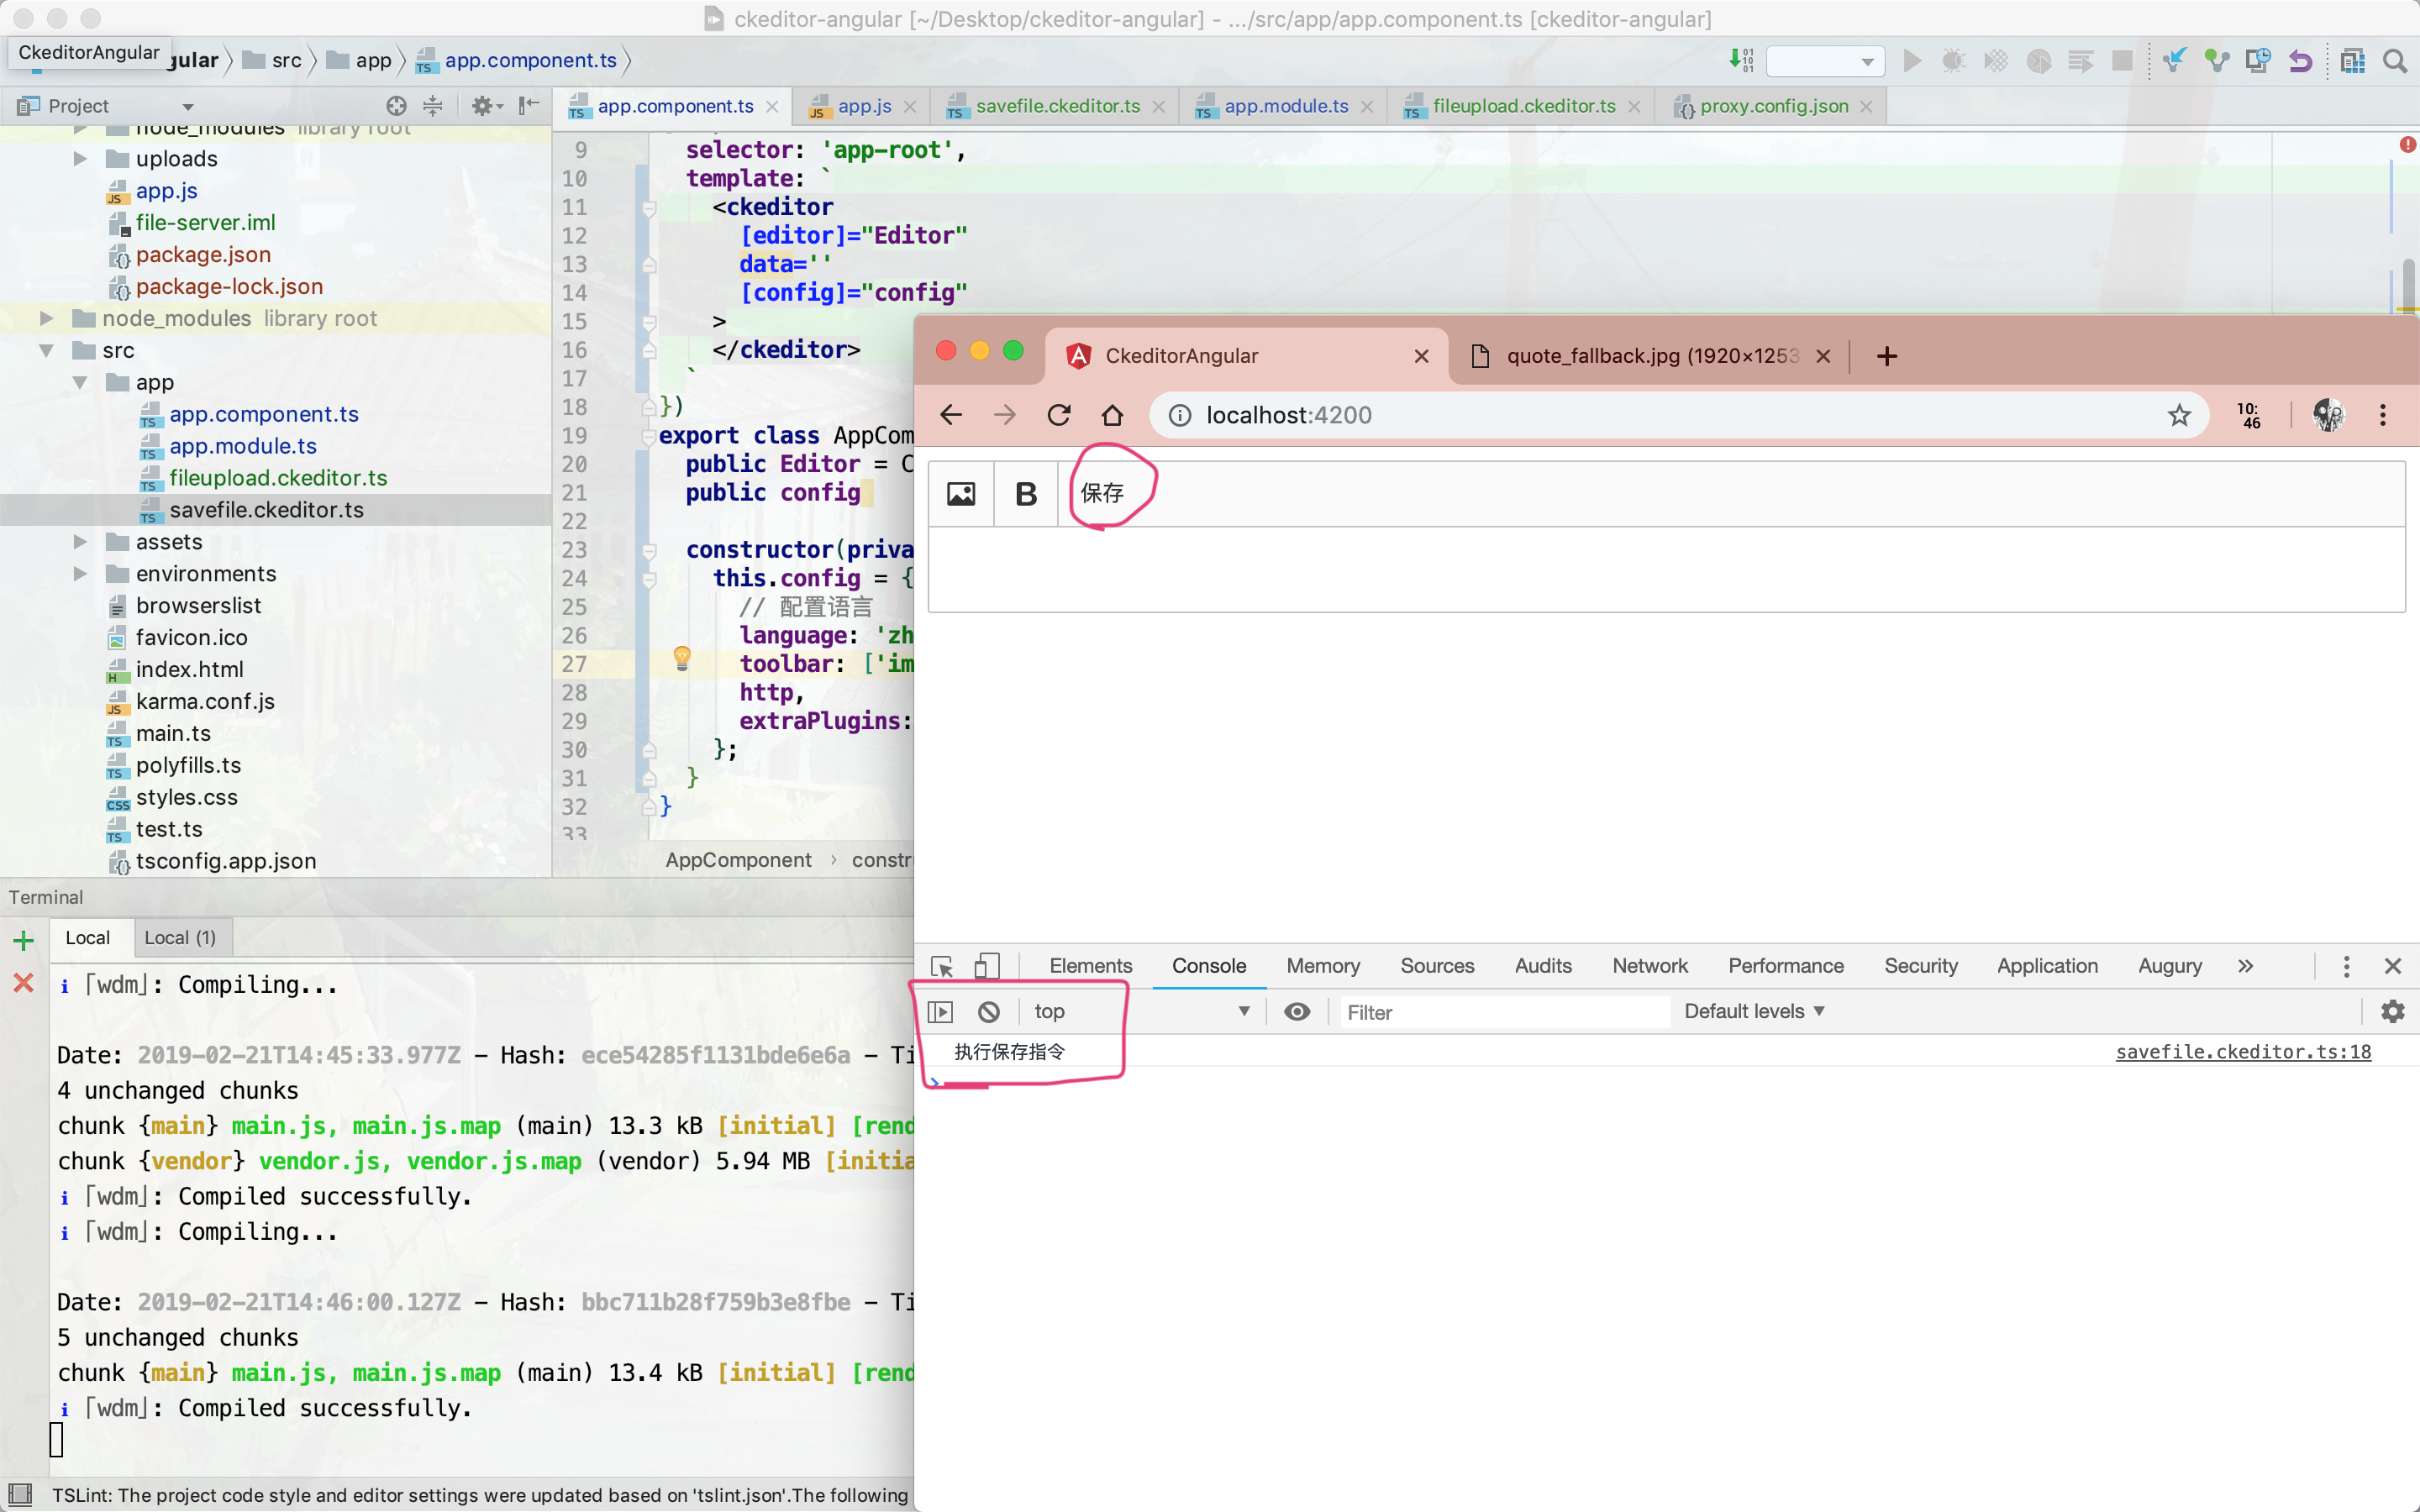
测试如下图,点击按钮后控制台有如下输出
获取内容
这里可以使用 ngModel 获取 ckeditor中的内容,注意要在app.module.ts中import添加 FormsModule 模块
app.component.ts 修改部分如下
1
2
3
4
5
6
7
8
9
10
11
12
13
14
15
16
17
18
|
@Component({
selector: 'app-root',
template: `
<ckeditor
[(ngModel)]="article.content"
[editor]="Editor"
[config]="config"
>
</ckeditor>
`
})
export class AppComponent {
public Editor = ClassicEditor;
public config
article = {content: ''};
}
|
前后端打通
我希望可以在 app.component.ts 中实现上传文章的逻辑;这里可以使用闭包的技术将这个函数注入到 savefile.ckeditor.ts 文件的 SaveFilePlugin 中,同时保留this的作用域,如下
app.component.ts 修改部分如下
1
2
3
4
5
6
7
8
9
10
11
12
13
14
15
16
17
18
19
20
21
22
23
24
25
|
constructor(private http: HttpClient) {
this.config = {
language: 'zh-cn',
toolbar: ['imageUpload', '|', 'bold', '|', 'save'],
http,
uploadContent: () => this.uploadContent(),
extraPlugins: [CustomUploadAdapterPlugin, SaveFilePlugin]
};
}
uploadContent() {
this.http.post('/upload/content', this.article)
.subscribe((resp) => {
console.log(resp);
}, (err) => {
console.log(err);
});
}
|
savefile.ckeditor.ts 修改部分如下
1
2
3
4
5
6
7
|
view.on( 'execute', () => {
const func = editor.config.get('uploadContent');
func();
} );
|
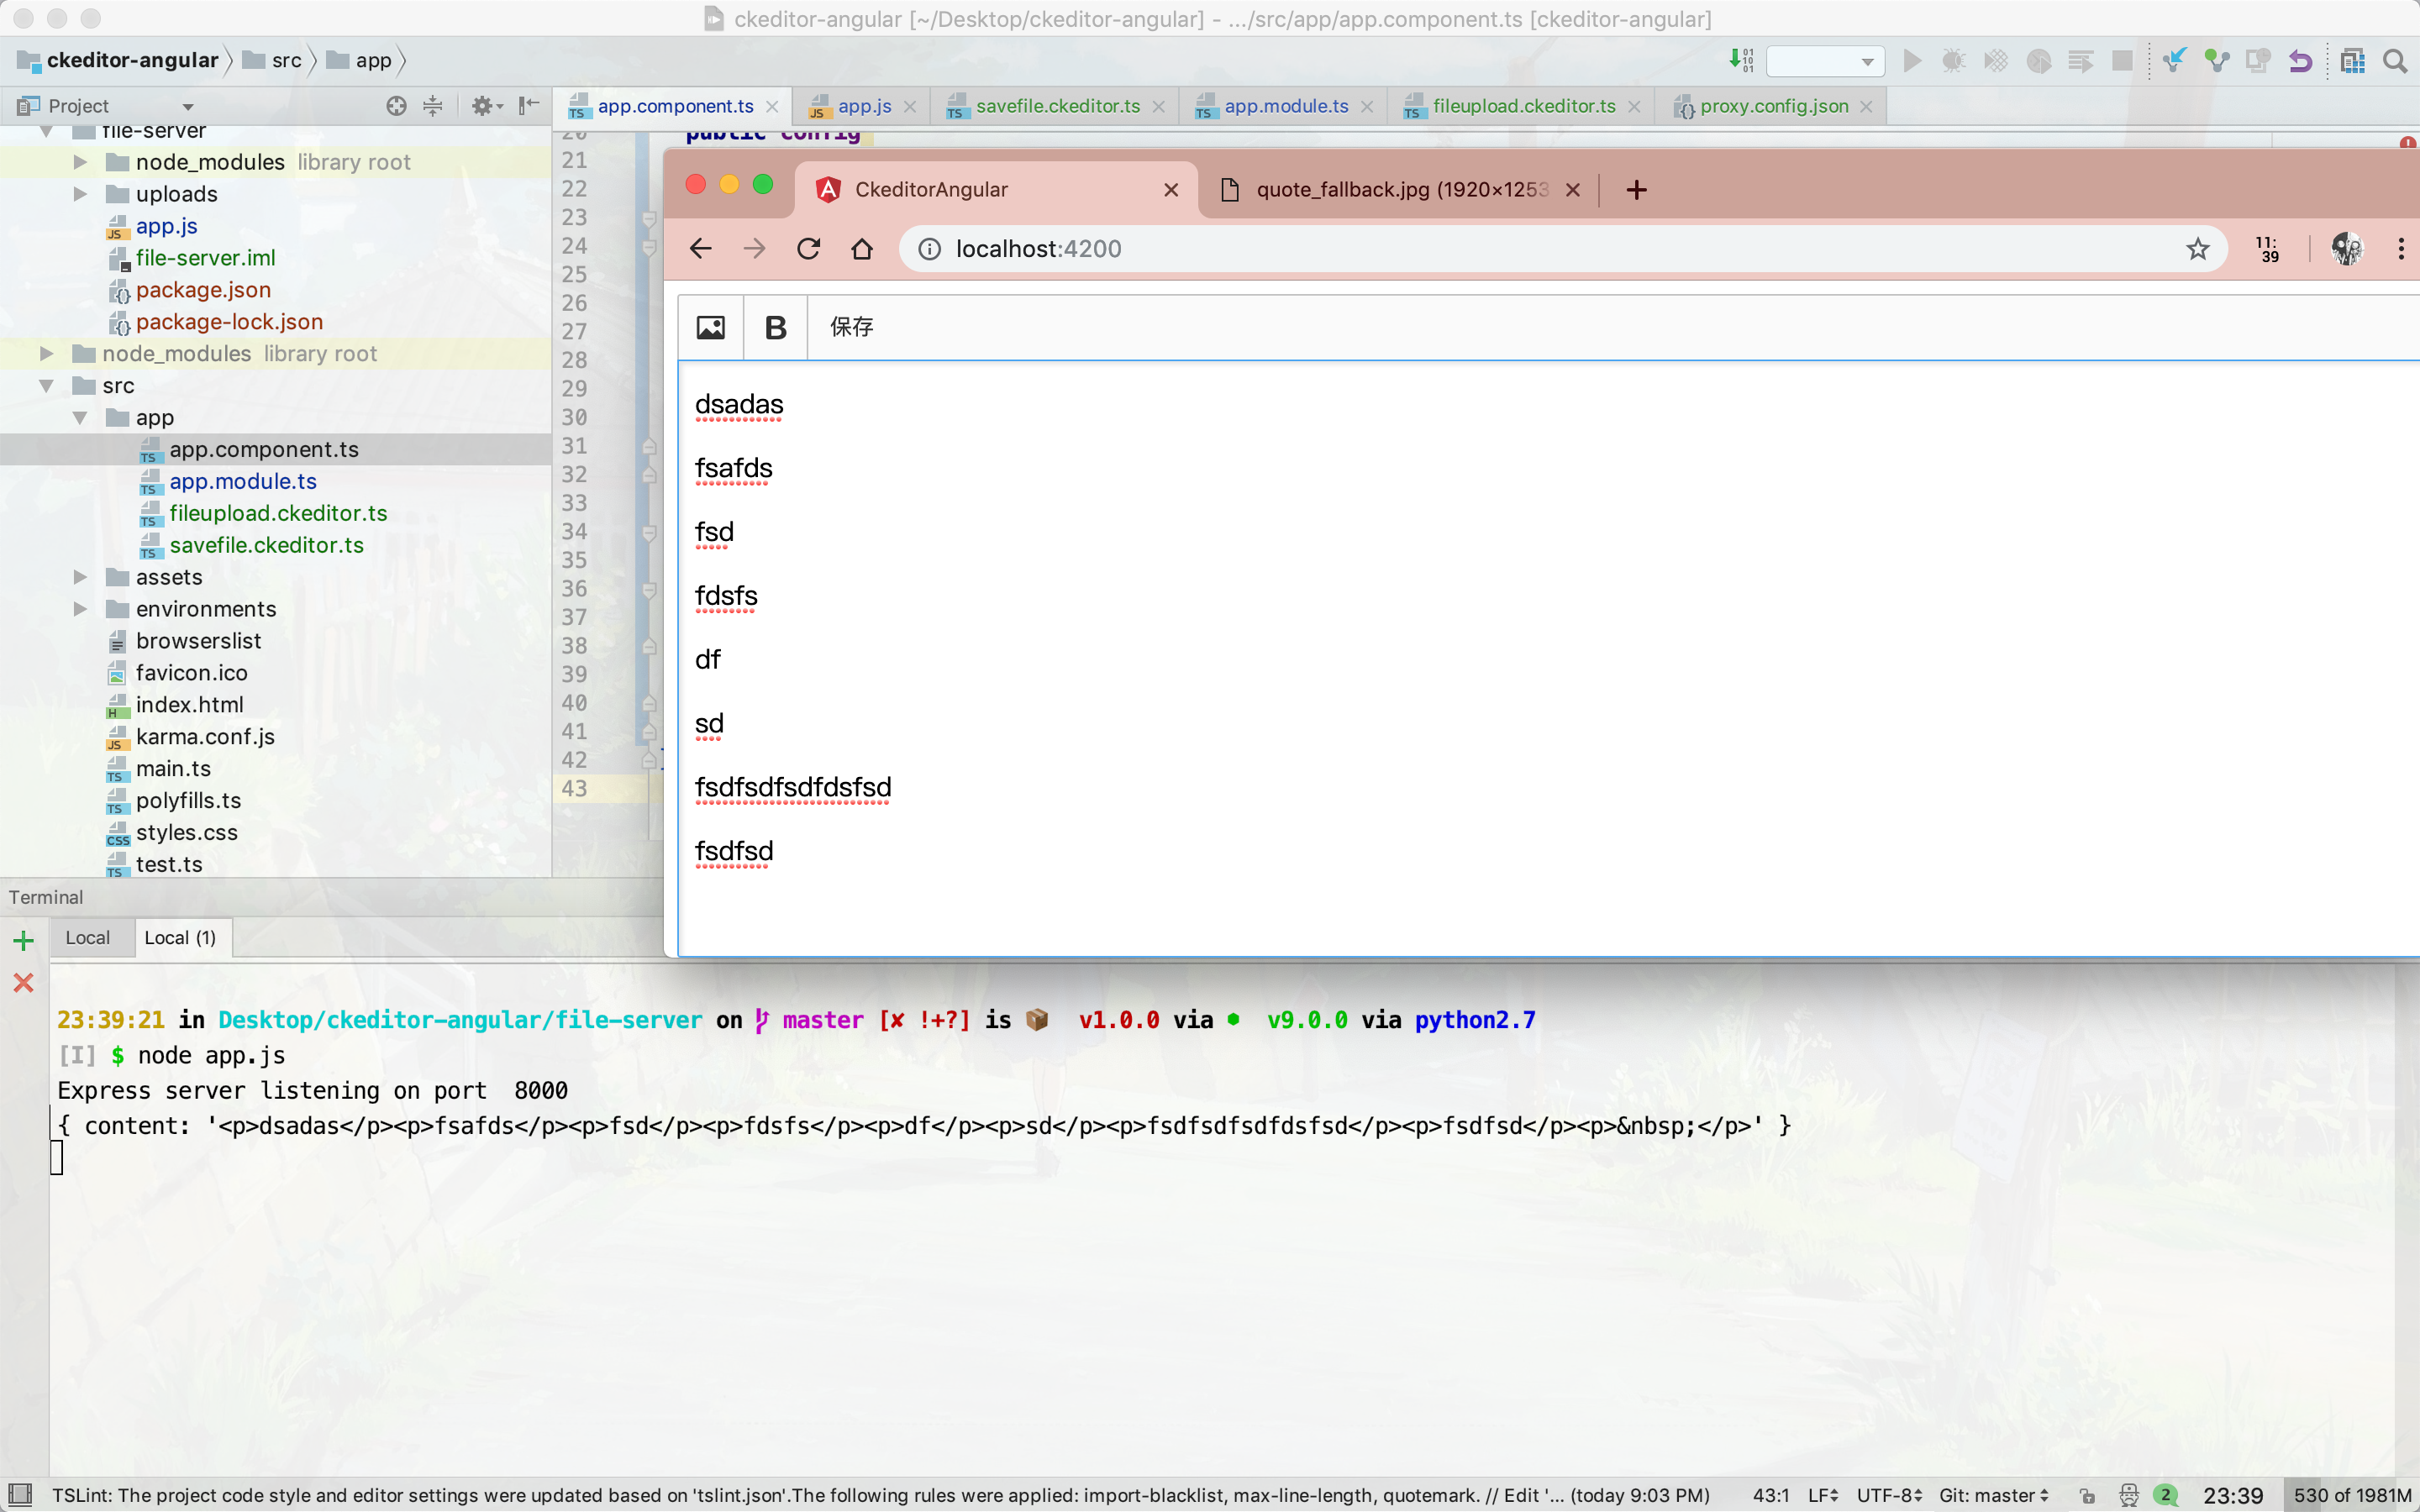
点击按钮进行上传,查看后台服务器输出:
总结
完整代码
踩了不少的坑,总结一下,但是官方文档还是很重要的