教程向:自己写一个hexo插件

玩转hexo的第一步:自己写一个插件

(更:由于将博客迁移至Github Page,网速较慢,所以现在一个移去了博客中所有的视频博文)

环境

  • node v8.5.0
  • hexo v3.7.1
  • hexo-cli v1.1.0

前言

Hexo对Markdown解析的不错,唯一不太完美的就是无法添加视频标签,不过其实也是可以的,如下

1
2
3
4
5
6
7
8
这是一篇博文

...

{% raw %}
<!-- 这里可以写原生的HTML代码 -->
{% endraw %}
...

但是如果我又想用第三方库把播放器装扮的好看一点呢,总归不可能写一次视频就写一大堆script,link,div标签吧,这样代码的重用性非常的不好,比较希望是如下效果

1
2
3
4
5
6
这是一篇博文

...

{% mdVideo video.mp4 %}{% endmdVideo %}
...

那就自己写一个插件呗。

ps:

1.这里的video.mp4是默认存在执行hexo new post时创建的文件夹中的,只要把配置文件_config.yml中的post_asset_folder设为true就可以了。这样子静态资源对应的路径就是http:// ... /文章名/video.mp4

  1. 需要对javascript的语法有一定的了解

准备工作

在博客的根目录的node_modules中创建一个文件夹,就把它叫做hexo-simple-video-tag好了,注意,文件夹一定要是以hexo-开头的,请参考官网文档:

1
2
First, create a folder in the node_modules folder.
The name of this folder must begin with hexo- or Hexo will ignore it.

到这个文件夹的根目录(/node_modules/hexo-simple-video-tag)下执行npm init命令,使其生成一个package.json文件,同时创建一个index.js文件目录如下

1
2
3
.
├── index.js
└── package.json

package.json(/node_modules/hexo-simple-video-tag/package.json)的文件内容如下

1
2
3
4
5
6
7
8
9
10
11
{
"name": "hexo-simple-video-tag",
"version": "1.0.0",
"description": "",
"main": "index.js",
"scripts": {
"test": "echo \"Error: no test specified\" && exit 1"
},
"author": "",
"license": "ISC"
}

nameversion的信息添加到博客根目录的package.json文件中

1
2
3
4
5
6
7
....
"dependencies": {
...

"hexo-simple-video-tag": "1.0.0"
},
....

使用npm script简化命令的输入,还是在博客根目录的package.json文件中

1
2
3
4
5
....
"scripts": {
"local": "hexo clean && hexo g && hexo s"
}
....

这样直接在命令行中执行npm run local就可以启动本地预览服务器了

好了,打开文件夹hexo-simple-video-tag中的index.js文件开始编写代码

关于 hexo.extend.tag.register 的说明请查看官方文档

1
2
3
4
5
6
7
8
9
hexo.extend.tag.register('mdVideo', function(args, content){
return `<div>Hello ${args[0]} tag! ${content}</div>`
// ends为true的话标签是这样的
// {%tag arg0 arg1 arg2%} content {%endtag%}
// false的话是这样
// {%tag%}
// 回调函数的 args参数是[arg0, arg1, arg2 ...] 组成的数组
// content是夹在标签之间的内容
}, {ends: true})

创建一篇新博文,就是本文的标题吧教程向:自己写一个hexo插件,写入如下内容
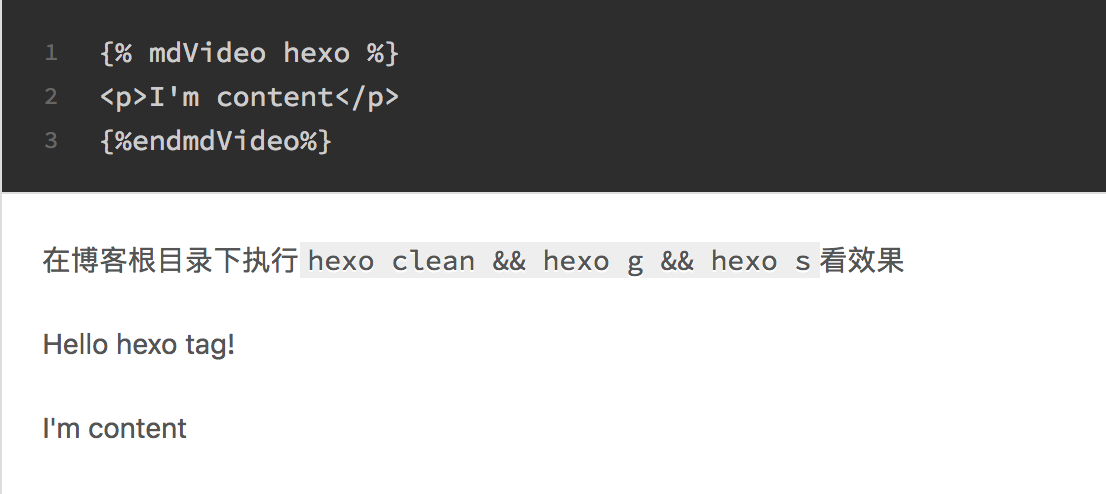
1
2
3
{% mdVideo hexo %}
<p>I'm content</p>
{%endmdVideo%}

在博客根目录下执行hexo clean && hexo g && hexo s看效果


编写函数逻辑

规定,传入的第一个参数,也就是args[0]为视频文件的名称,且视频不在首页显示

1
2
3
4
5
6
7
8
9
10
11
12
13
14
15
16
17
18
19
20
21
22
23
24
25
26
27
28
29
30
31
hexo.extend.tag.register('mdVideo', function(args, content){
var filename = args[0]
// 判断是否有值输入
if (filename === null) {
console.error('>>>>>>>错误:请填写视频的名');
throw new Error('缺少视频名')
}

// 获取博客根路径,用于判断当前路径是否为根路径
const blog_root = hexo.config.root;
return `
<video id="video_tag" controls></video>
<script>
var $video = document.getElementById('video_tag')
var cur_url = window.location.href;
var idx = cur_url.lastIndexOf('/');
// 如果是根路径,则不显示
if (window.location.pathname === "${blog_root}") {
$video.style.display = "none"
} else {
// 对路径进行拼接,结果如下
// 文章径路 http://localhost:4000/2018/05/20/hexo-plugin-example/
// 视频路径 http://localhost:4000/2018/05/20/hexo-plugin-example/result.mp4
// 进行这样拼接的原因是,如果你设置了 <!-- more --> 的话,则文章路径会变成下面这样子
// http://localhost:4000/2018/05/20/hexo-plugin-example/#more
// 必须要把 '#more' 去掉
$video.setAttribute("src", cur_url.slice(0, idx+1)+ "${filename}");
}
</script>
`
}, {ends: true})

在对应的资源文件夹中添加视频

1
2
3
4
5
.
├── _posts
│ ├── hexo-plugin-example
│ │ └── result.mp4
│ ├── hexo-plugin-example.md

并在文章中输入如下内容看效果,重新执行 npm run local

1
{% mdVideo result.mp4 %}{% endmdVideo %}
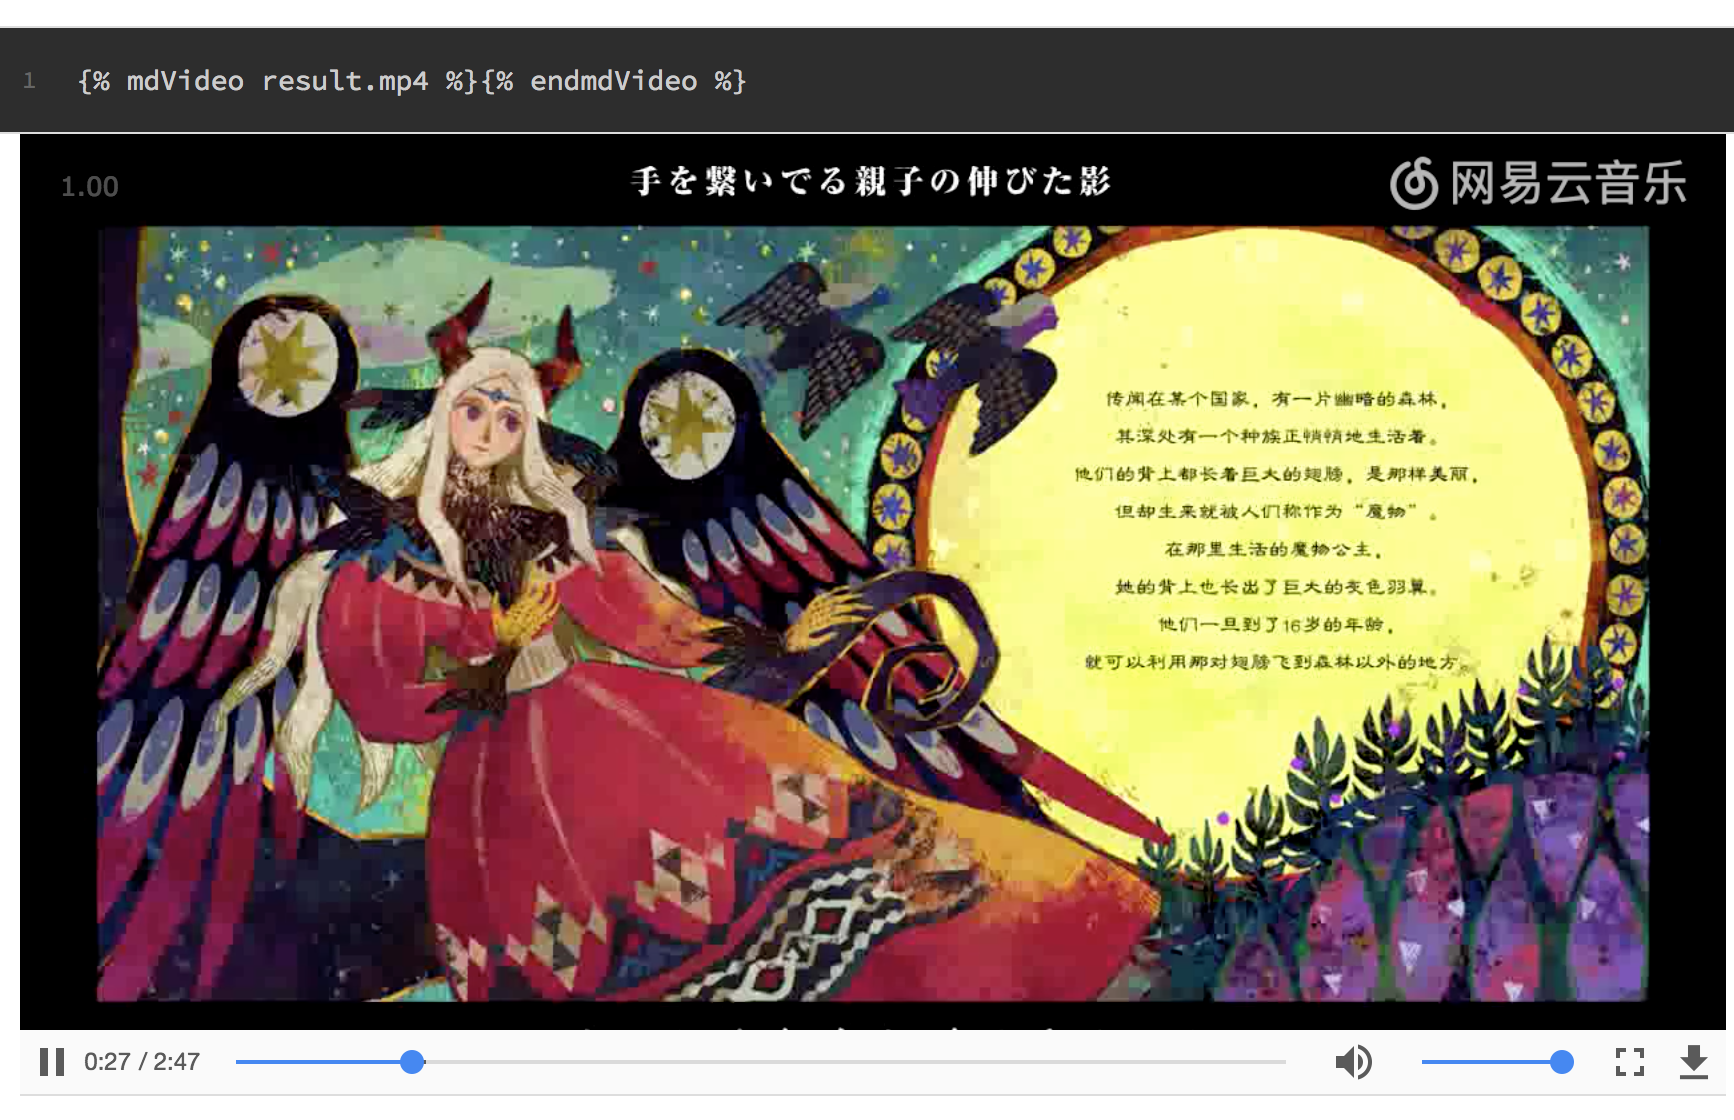
莓问题!


一些改进

当你要添加第三方播放器库的时候,就可以非常方便地修改插件而对所有的视频标签进行修改了,不过有一些主题的css会影响到H5视频的全屏播放功能,而且压缩的js过大导致hexo在generate时出错,这些问题我都在之前的一篇文章里有说,就在前几篇的位置,名字叫经验向:使用HEXO的两个小坑以及一个效率优化